Install Glassworks on the Aqara S1 Plus
On this page
There are two ways to install, and they do the same thing. Kiln, the web installer, runs in your browser and needs nothing else. The command line runs the same steps as shell scripts, for scripting or if you'd rather not use WebUSB. Both back up the panel first and both can undo.
Note
The old S1 installer runs the same recipe as Kiln. It has been tested end to end on a real S1 Plus (firmware 4.5.80), from FEL mode through the backup, the install and the app setup, and so has the command line. Kiln itself has not yet done a full install on a real panel. The boot patch has been tested on two firmware versions: 4.5.80 and the December 2025 firmware the panel shipped with. So far that is a small number of panels. If anything looks wrong, stop and open an issue. Your backup is safe.
Before you start
- Panel: Aqara Panel Hub S1 Plus (MP-K03D). See supported hardware.
- Cable: a USB-C data cable. Many charging cables carry no data. Plug it straight into the computer, not through a hub or dock.
- Tool: a small screwdriver to open the back cover. You need to reach one button on the board.
- Computer: Chrome or Edge on Windows, macOS or Linux (WebUSB). Firefox and Safari don't support WebUSB. If they can't, Kiln says Use Chrome or Edge instead of its first screen.
- Home Assistant on the same network, with the ESPHome integration available (it's built in). 2026.11 or newer is recommended: it sets up the panel's encryption by itself.
- About 10 minutes.
One-time setup for your computer
| OS | What to do |
|---|---|
| macOS | Nothing. If you use adb, run adb kill-server first, because only one program can hold the panel. |
| Windows | Once: with the panel in FEL mode, open Zadig, choose Options → List all devices, pick USB Device (1f3a:efe8), select WinUSB and click Replace driver. Kiln's own USB mode installs its driver by itself. |
| Linux | Once: save the rule below as /etc/udev/rules.d/50-s1.rules and run sudo udevadm control --reload. Stop adb if it is running (adb kill-server). |
SUBSYSTEM=="usb", ATTR{idVendor}=="1f3a", ATTR{idProduct}=="efe8", MODE="0660", TAG+="uaccess"
SUBSYSTEM=="usb", ATTR{idVendor}=="1f3a", ATTR{idProduct}=="1010", MODE="0660", TAG+="uaccess"
Kiln's Connect screen reminds you of this step on Windows and Linux. Its How link points here.
Finding the FEL button
FEL is the A133's USB recovery mode; Kiln calls it recovery mode. It lives in the chip's mask ROM, so it is always there and it doesn't care what is on the eMMC. With the back cover off, the button is a small tactile switch to the right of the shield can's notch, just below the round sensor window. It is not the reset button on the case.
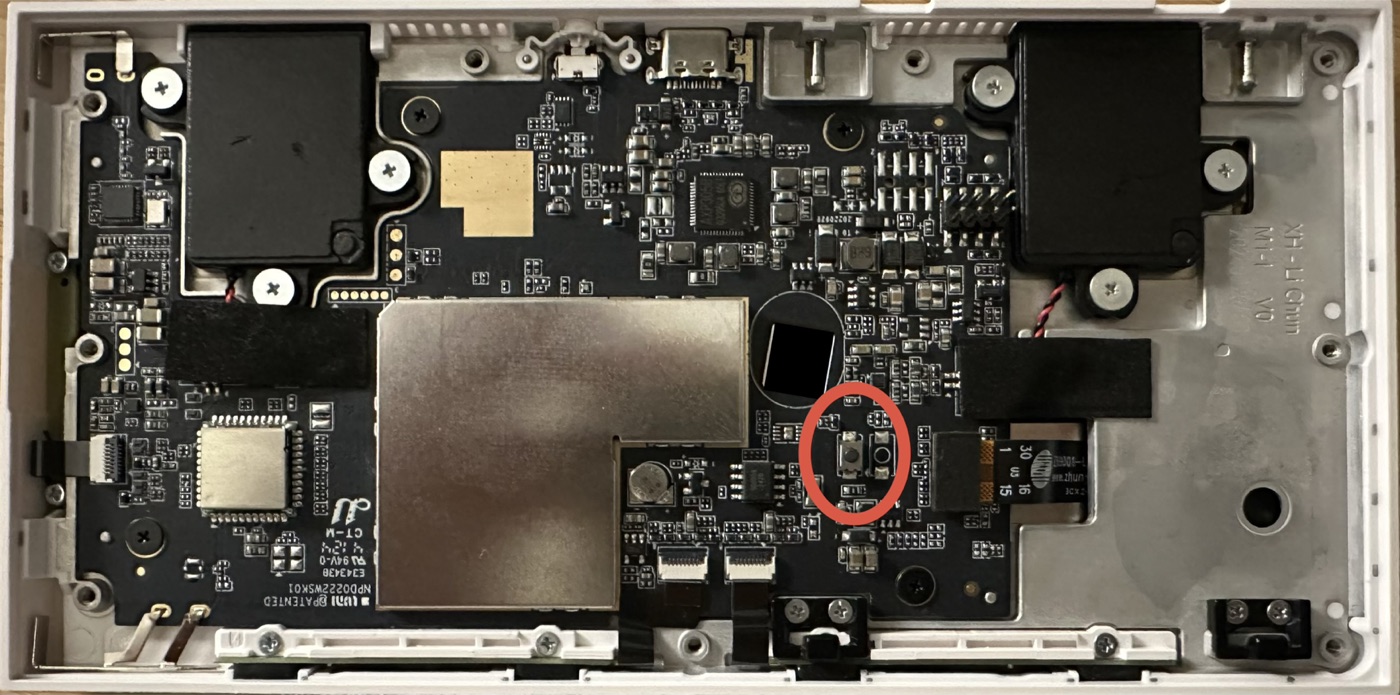
To enter FEL: unplug the panel, hold the button, plug in USB-C, then let go. It enters FEL as soon as it has power, within about two seconds. The screen stays black. That's expected.
Install with Kiln
Open Kiln in Chrome or Edge. Nothing is uploaded anywhere: the page talks to the panel over USB and keeps its backup in the browser.
The rail on the left shows where you are: Panel → Connect → Install → Set up → Done. Each step has its own address, so you can bookmark or reload one:
Address (after kiln.glassworks.dev) |
What it does |
|---|---|
/ |
Pick your panel |
/aqara-s1-plus |
A full install: starts at Connect, with the panel in FEL mode |
/aqara-s1-plus/set-up |
Finish setting up an installed panel: connects to it over USB (no FEL, nothing reflashed), updates S1 Kiosk with your settings, then Wi-Fi, Home Assistant and radio |
/aqara-s1-plus/set-up/wifi |
Just the Wi-Fi step, on an installed panel |
/aqara-s1-plus/set-up/home-assistant |
Just the Home Assistant step |
/aqara-s1-plus/set-up/radio |
Just the Zigbee/Thread radio role |
/aqara-s1-plus/undo |
Undo an install: put the original software back |
The old installer's addresses still work at the end of Kiln's: #/resume, #/wifi,
#/home-assistant, #/radio, #/undo and #/install go to the matching step. While Kiln is
working, a step's address shows that step. Going to another one doesn't stop it, and the picker
offers Back to it.
1 · Panel
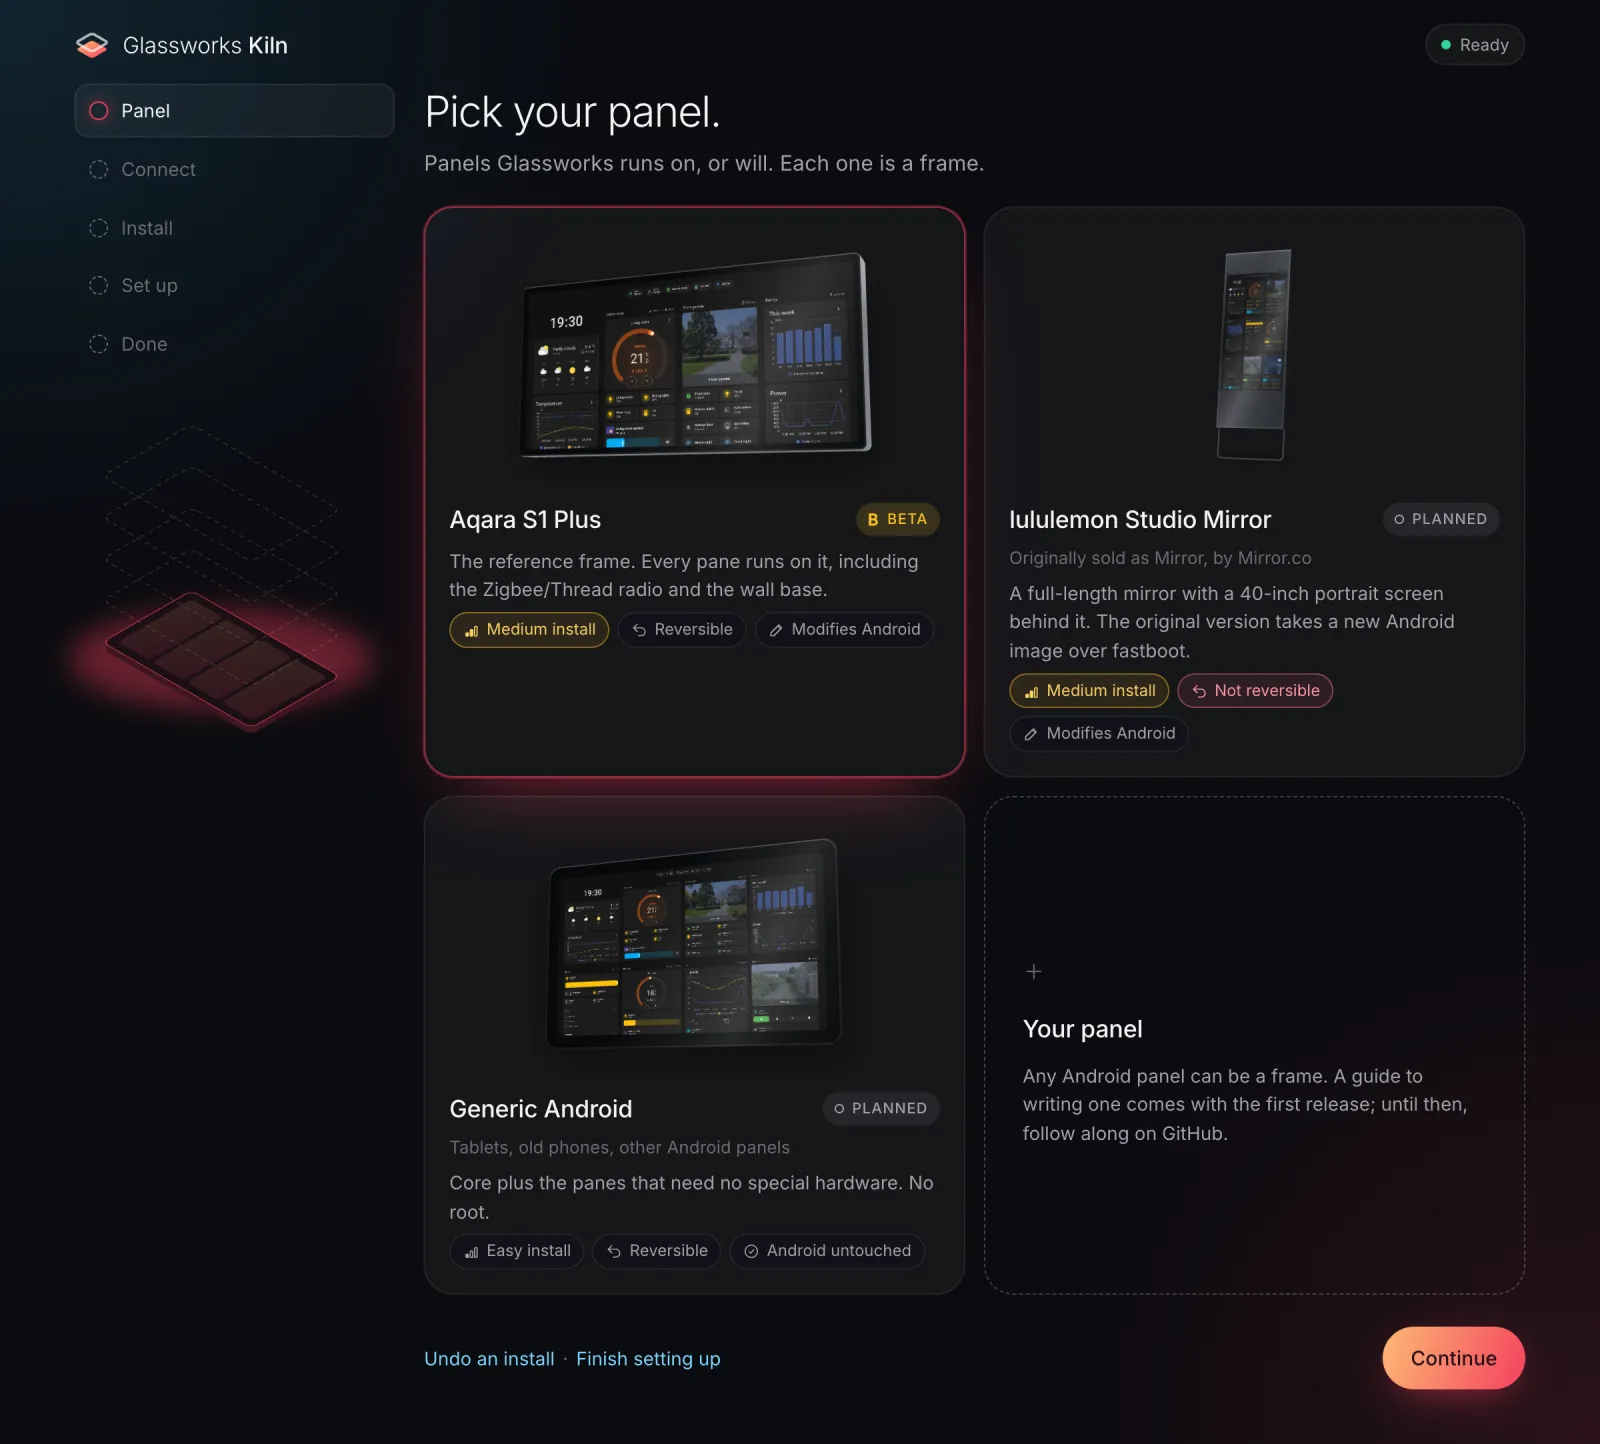
Pick Aqara S1 Plus, then Continue. The two links at the bottom are for a panel that is already installed.
2 · Connect
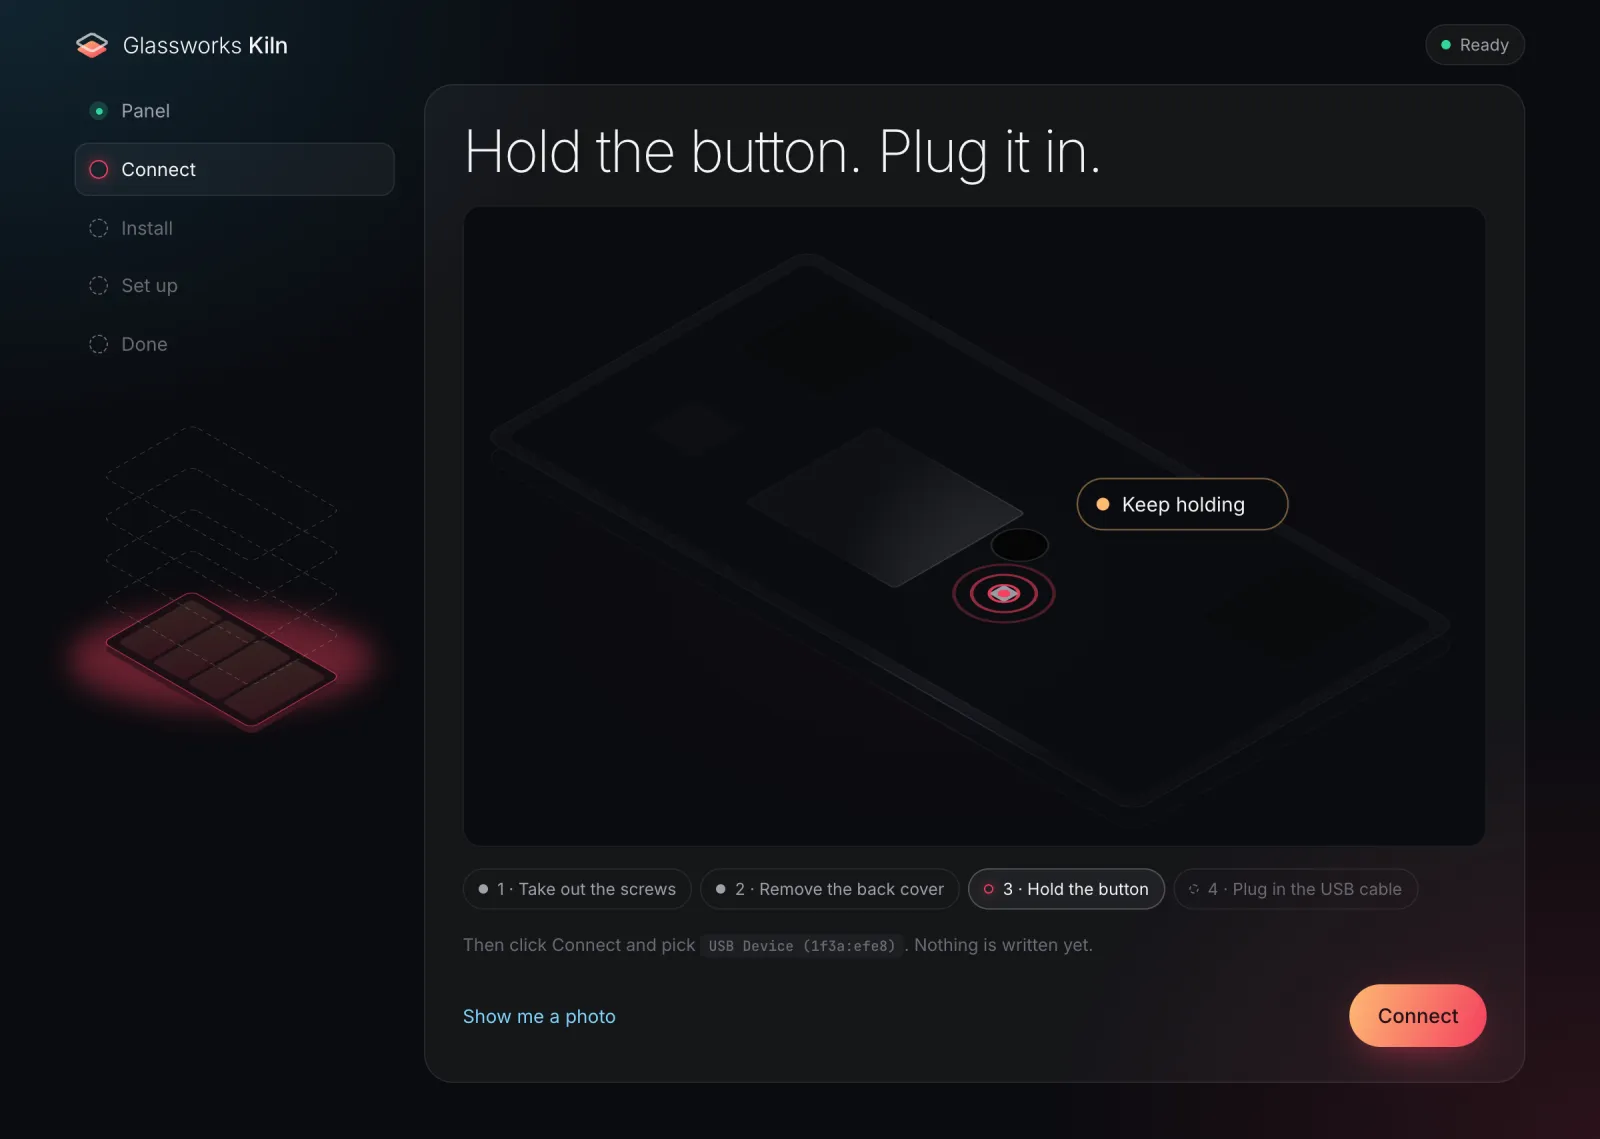
The animation is the instruction. Show me a photo opens the board photo above.
- Put the panel in FEL mode as described above.
- Click Connect and pick
USB Device (1f3a:efe8)in the browser's list.
Kiln checks that the chip is an A133 with secure boot off before it does anything else. If the list is empty, or the device won't open, see Troubleshooting.
3 · Install
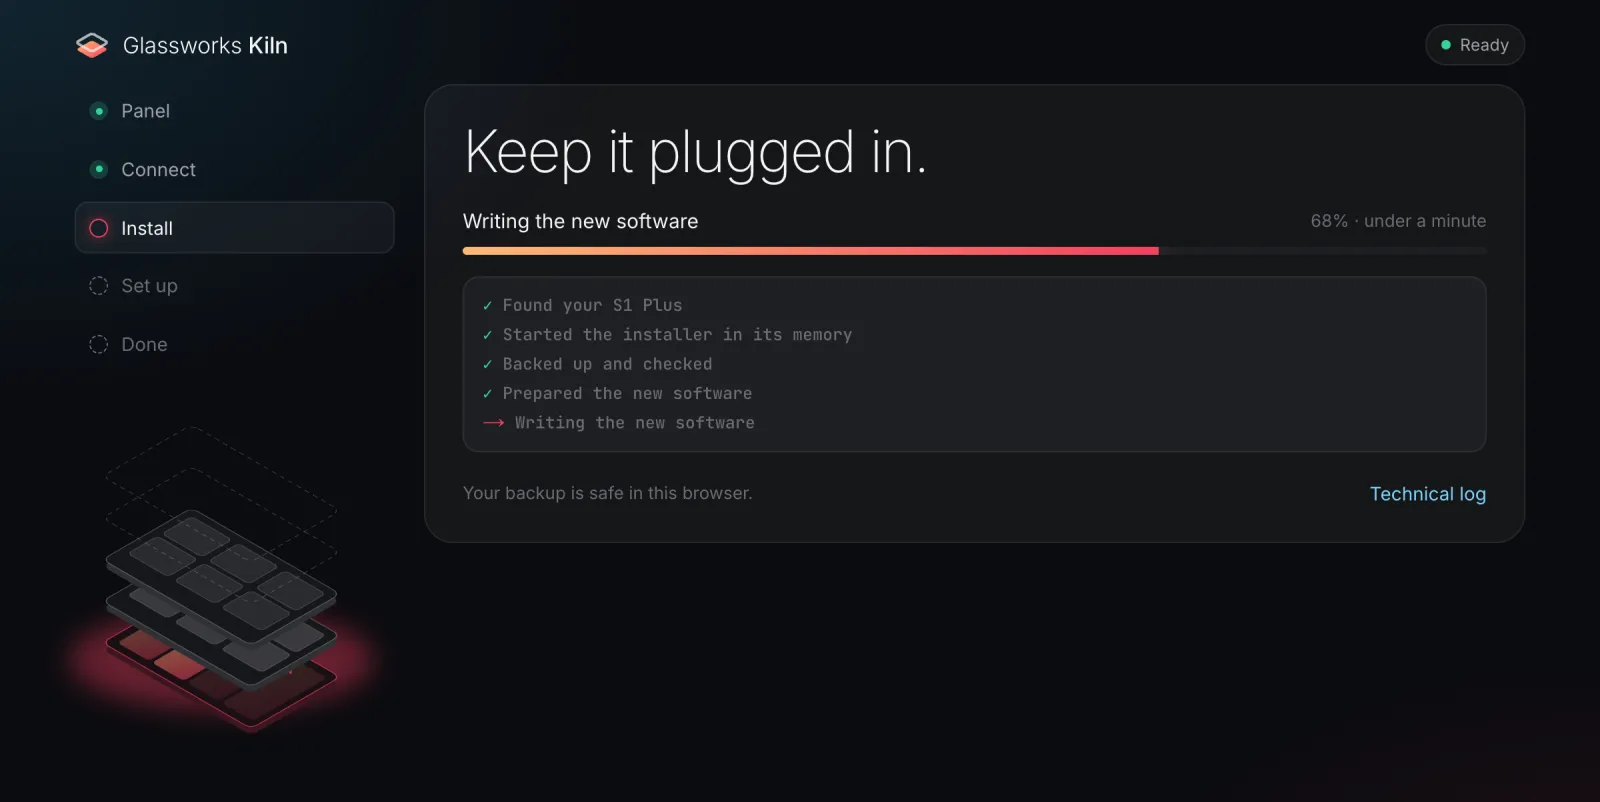
Keep the cable in and the page open. Technical log shows each partition with its size and hash.
Kiln:
- starts its own U-Boot from RAM, so nothing is written yet, and checks that the partition layout is an S1 Plus;
- backs up
boot,vbmetaand the other small partitions, readingboottwice and comparing. The backup is stored in this browser. From here on the screen says Your backup is safe in this browser; - patches
bootin the browser: Magisk v31.1, the S1 root helper, the boot animation, and this browser's adb key for the first boot. The result is byte for byte what the CLI's Docker-based patch produces; - sets the
vbmetaflags to "verification off" if they aren't already, and swaps in the Glass Tile splash; - flashes each partition and reads it back to check it, then restarts the panel.
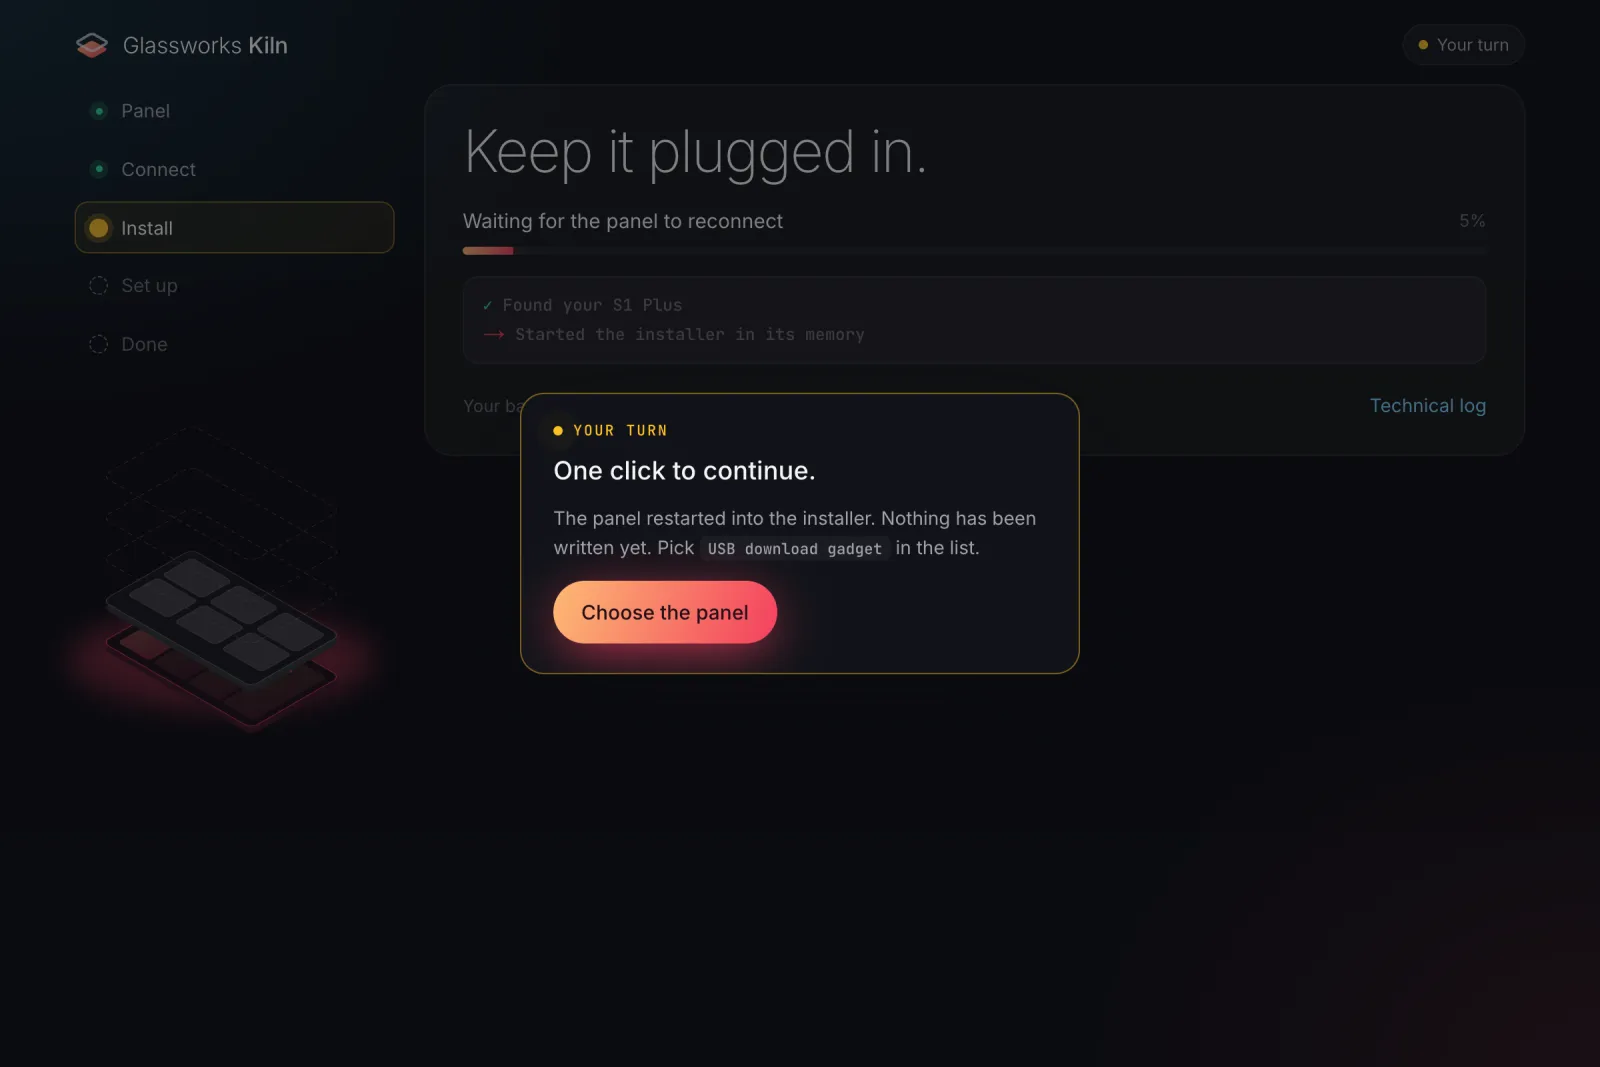
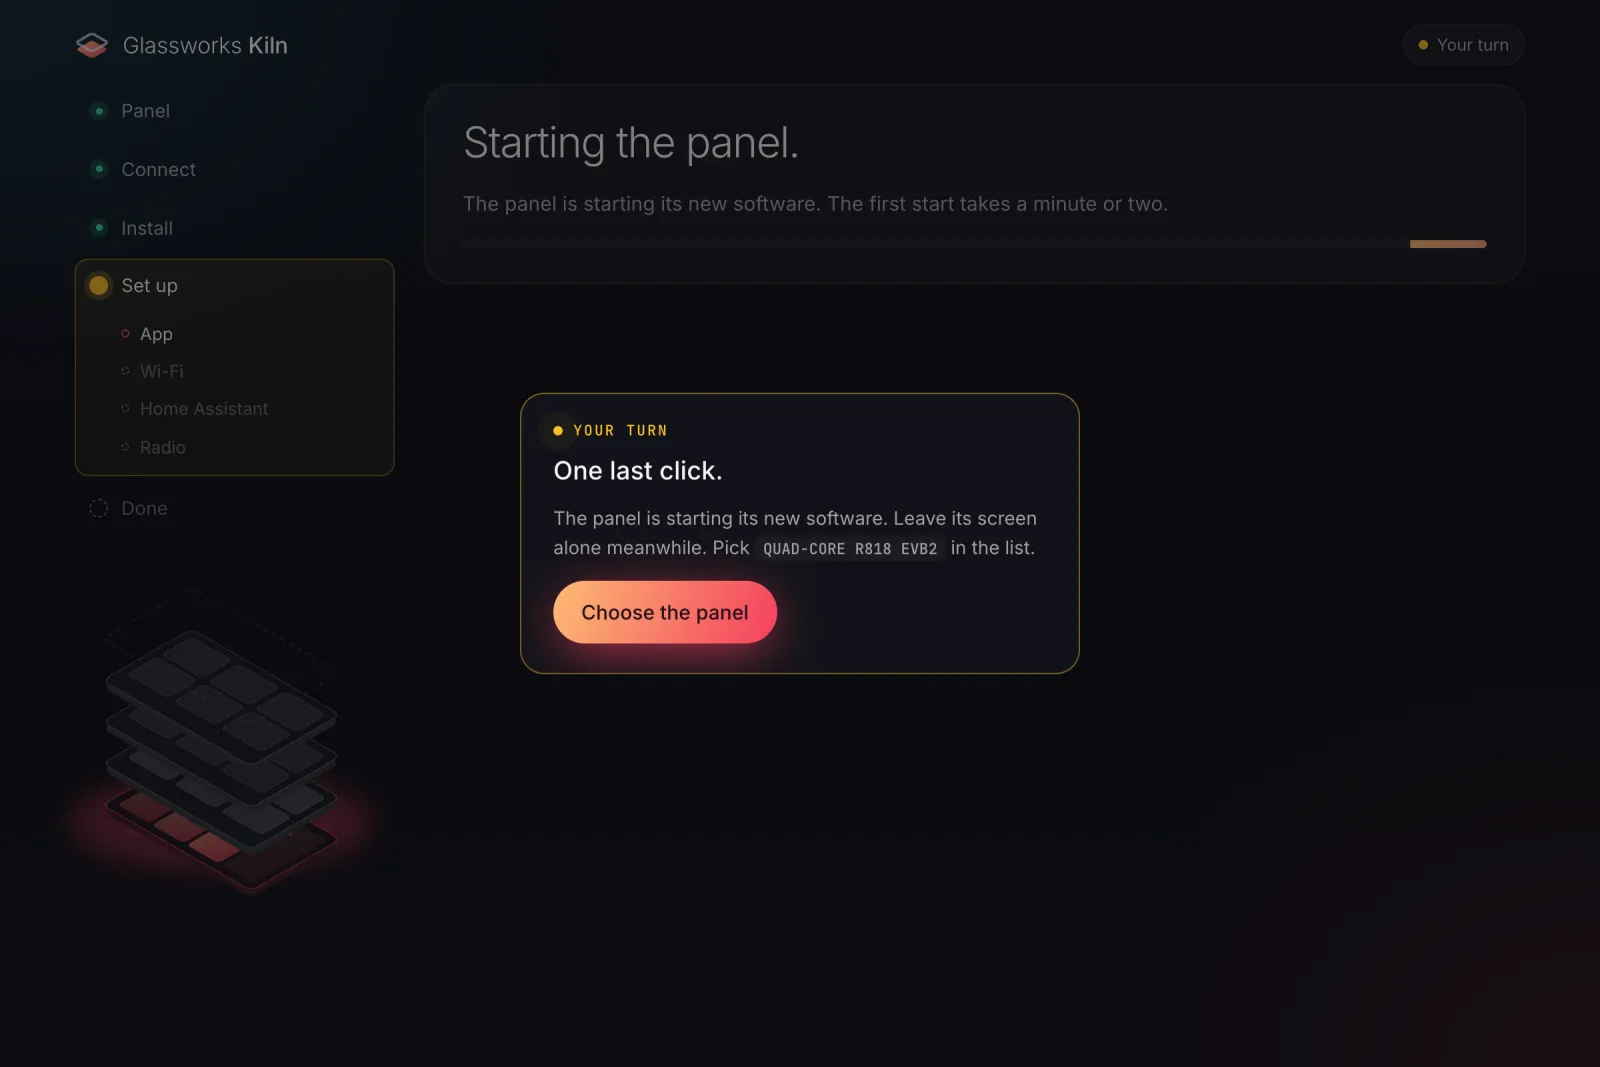
Twice during this step the browser needs a click from you, because WebUSB opens a new device only from a click. Kiln shows a Your turn sheet each time:
 |
 |
After U-Boot starts: click Choose the panel and pick USB download gadget. |
After the restart: pick QUAD-CORE R818 EVB2. The first start takes a minute or two. |
If you close the browser's list without picking, the sheet says so. Click the button again.
4 · Set up
S1 Kiosk goes on the panel and becomes its home screen. Then Wi-Fi, Home Assistant and the radio, from the same page. The rail shows these four as App, Wi-Fi, Home Assistant, Radio, and you can go back to any of them.
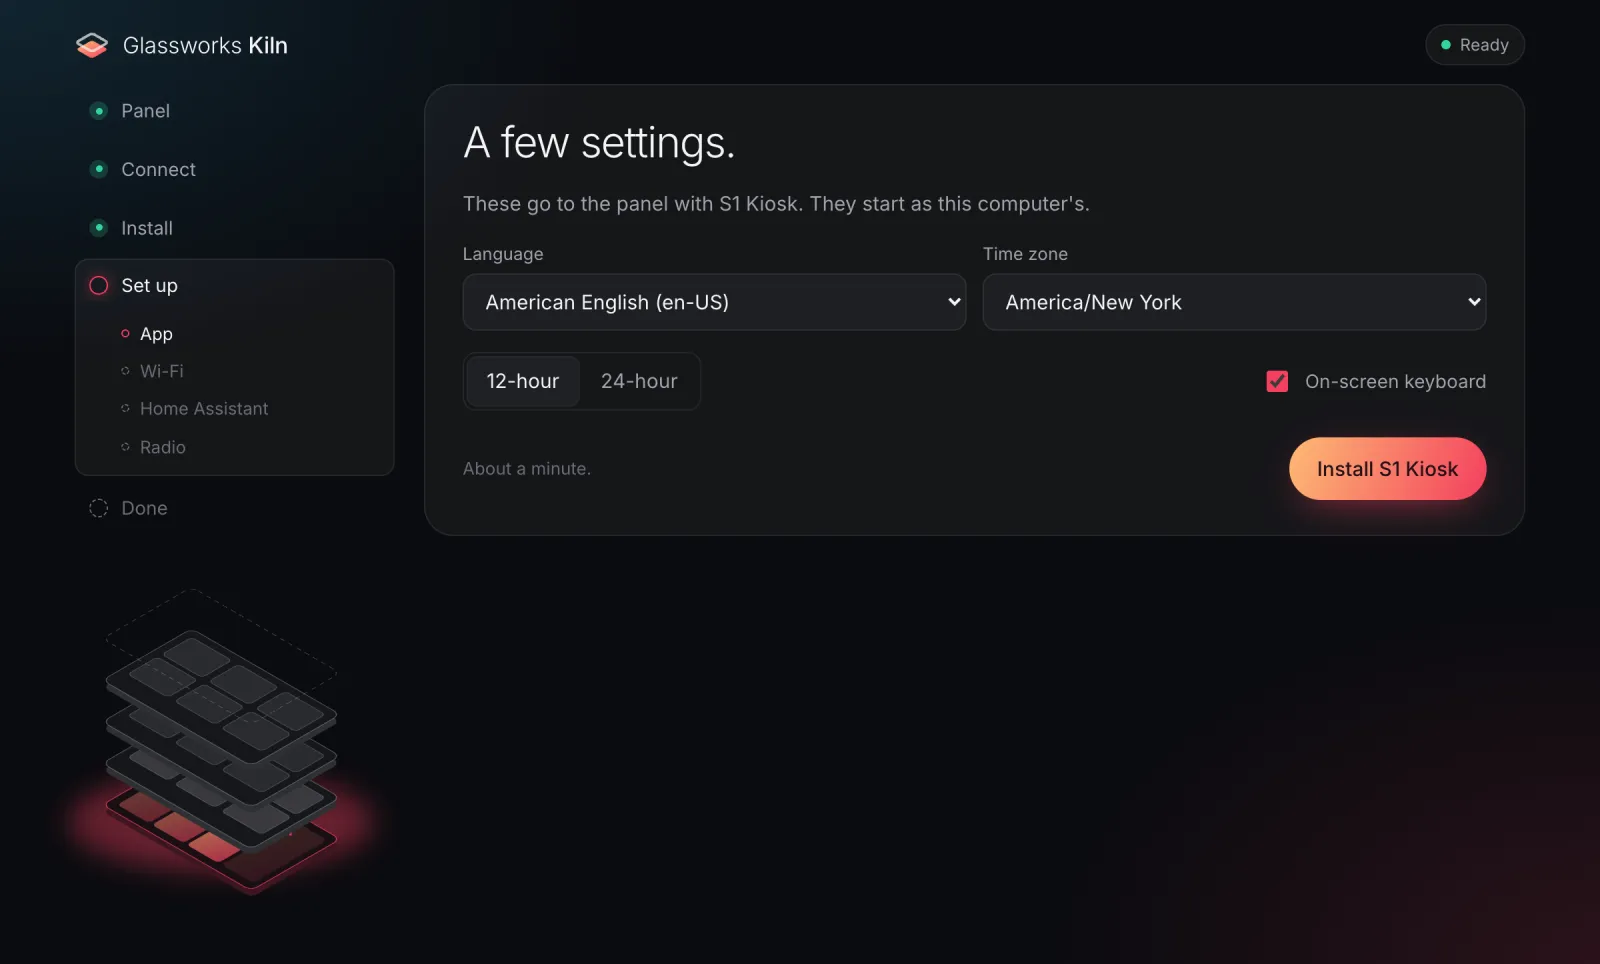
App. Language, time zone, 12- or 24-hour clock, and an on-screen keyboard (Simple Keyboard, Apache-2.0) instead of Aqara's. They start as this computer's. Click Install S1 Kiosk. It takes about a minute.
 |
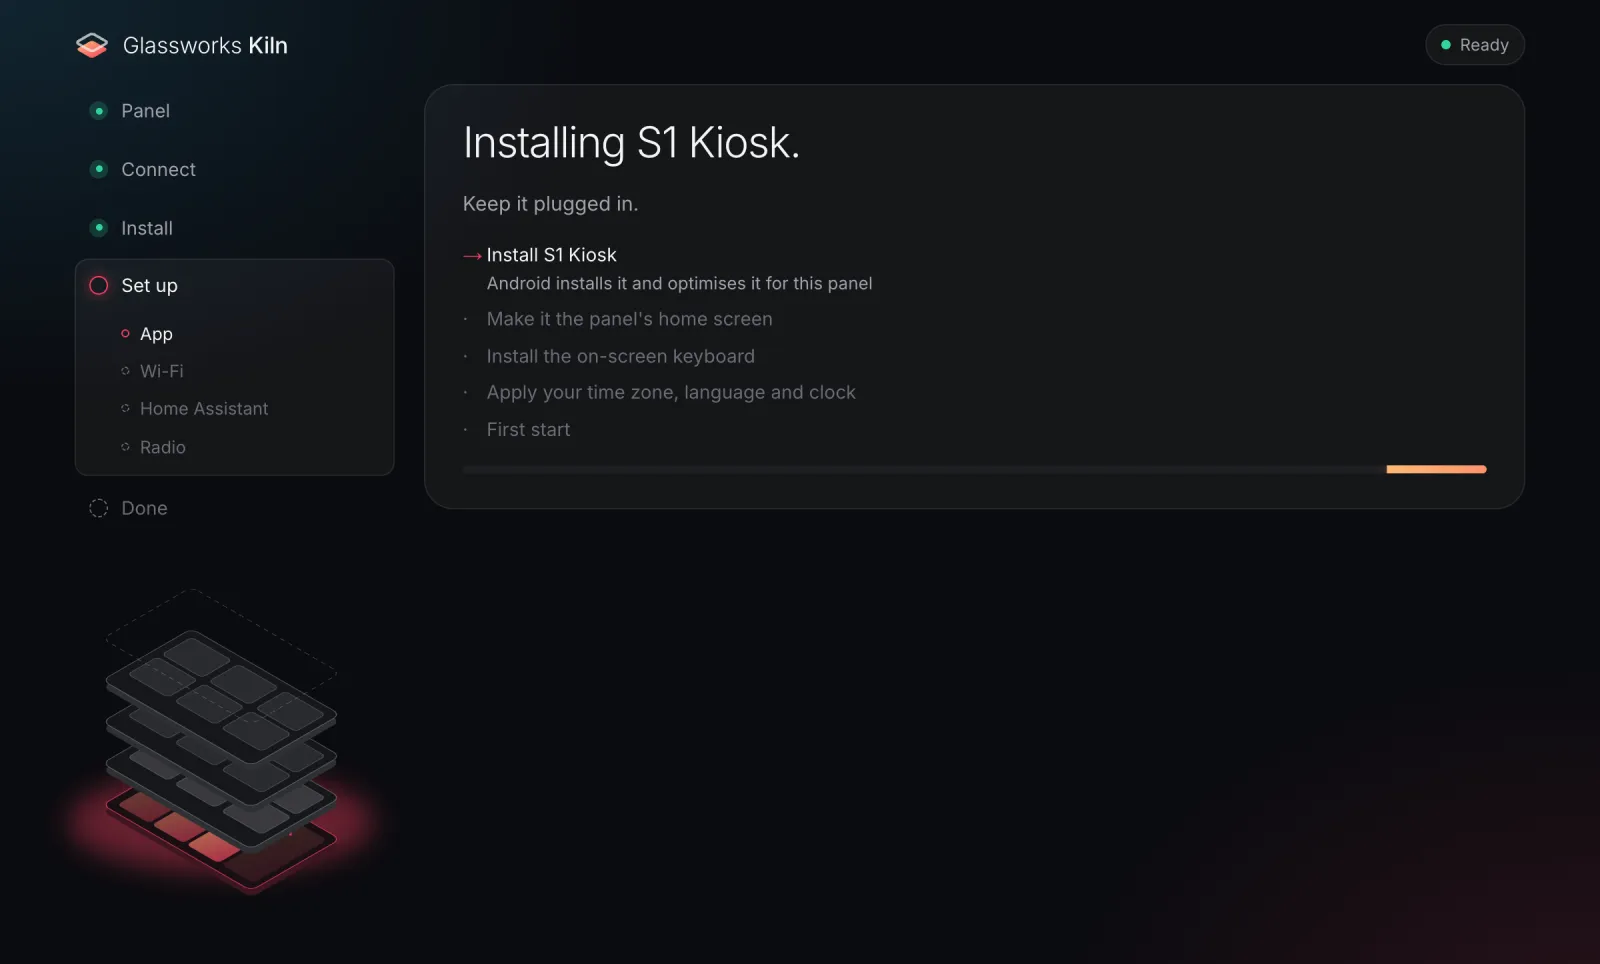 |
| The settings. On an installed panel the heading says Update S1 Kiosk. | The app going in. On an update, the app on the panel closes and restarts during this. That's expected. |
The time zone is kept from then on. Aqara's software would reset it at every boot: see Time zone.
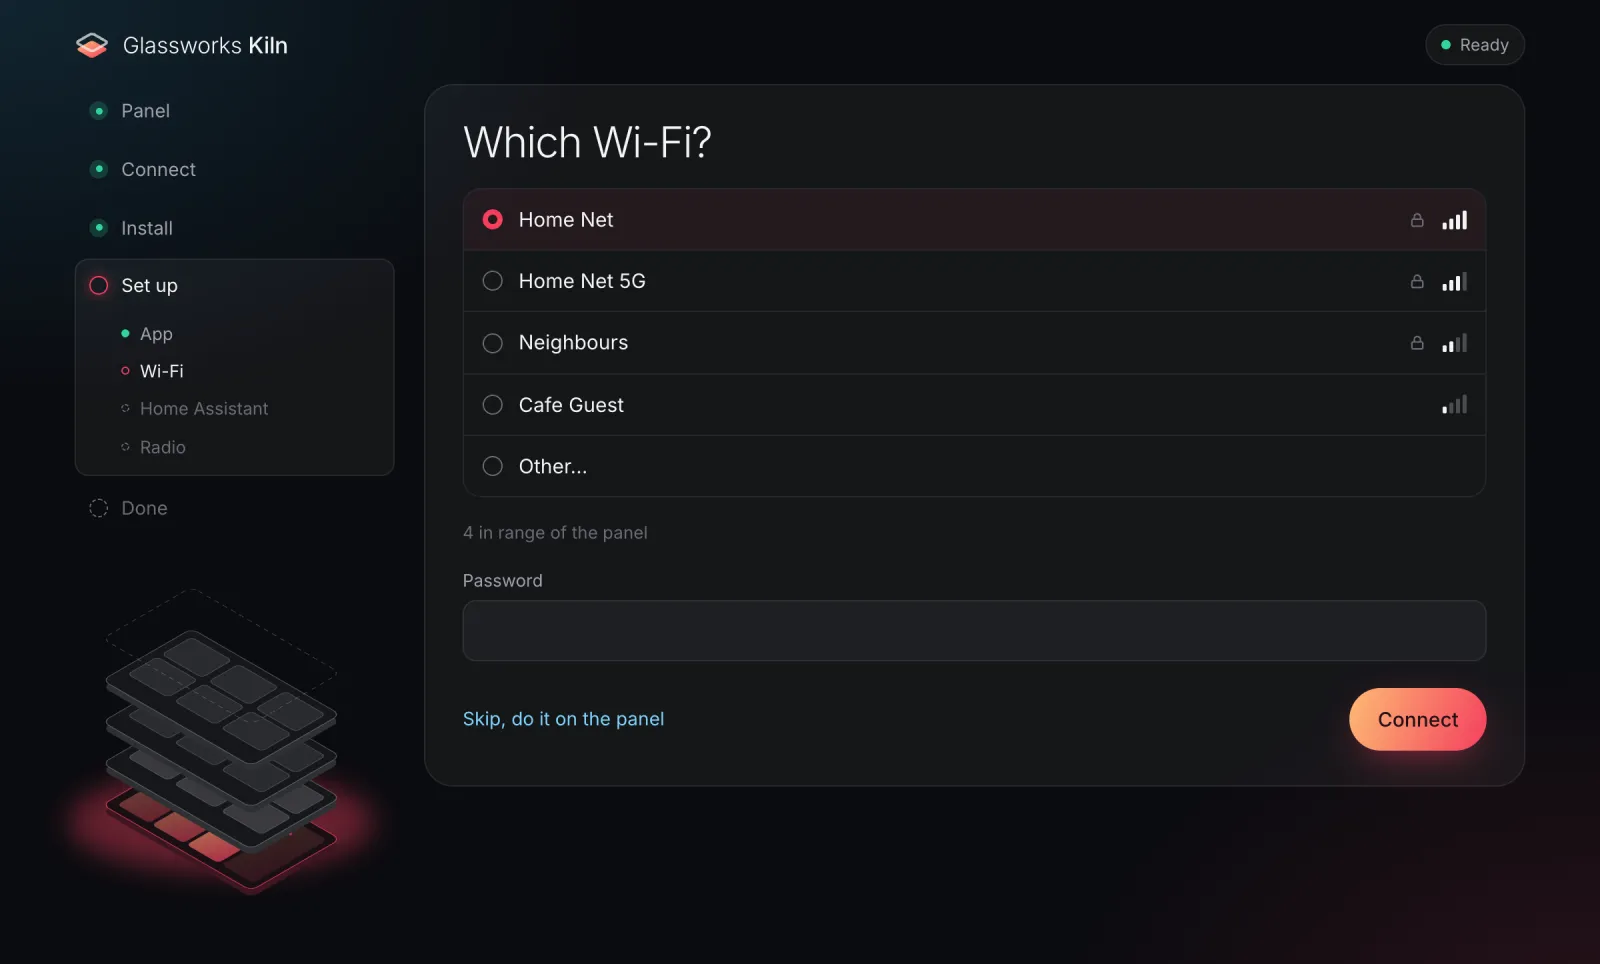
Wi-Fi. The list is what the panel can see. Pick a network, type its password and click Connect. The password goes straight to the panel over USB and isn't stored on your computer. A panel that is already on Wi-Fi shows Connected to …: click Continue to keep it, or Use another network.
 |
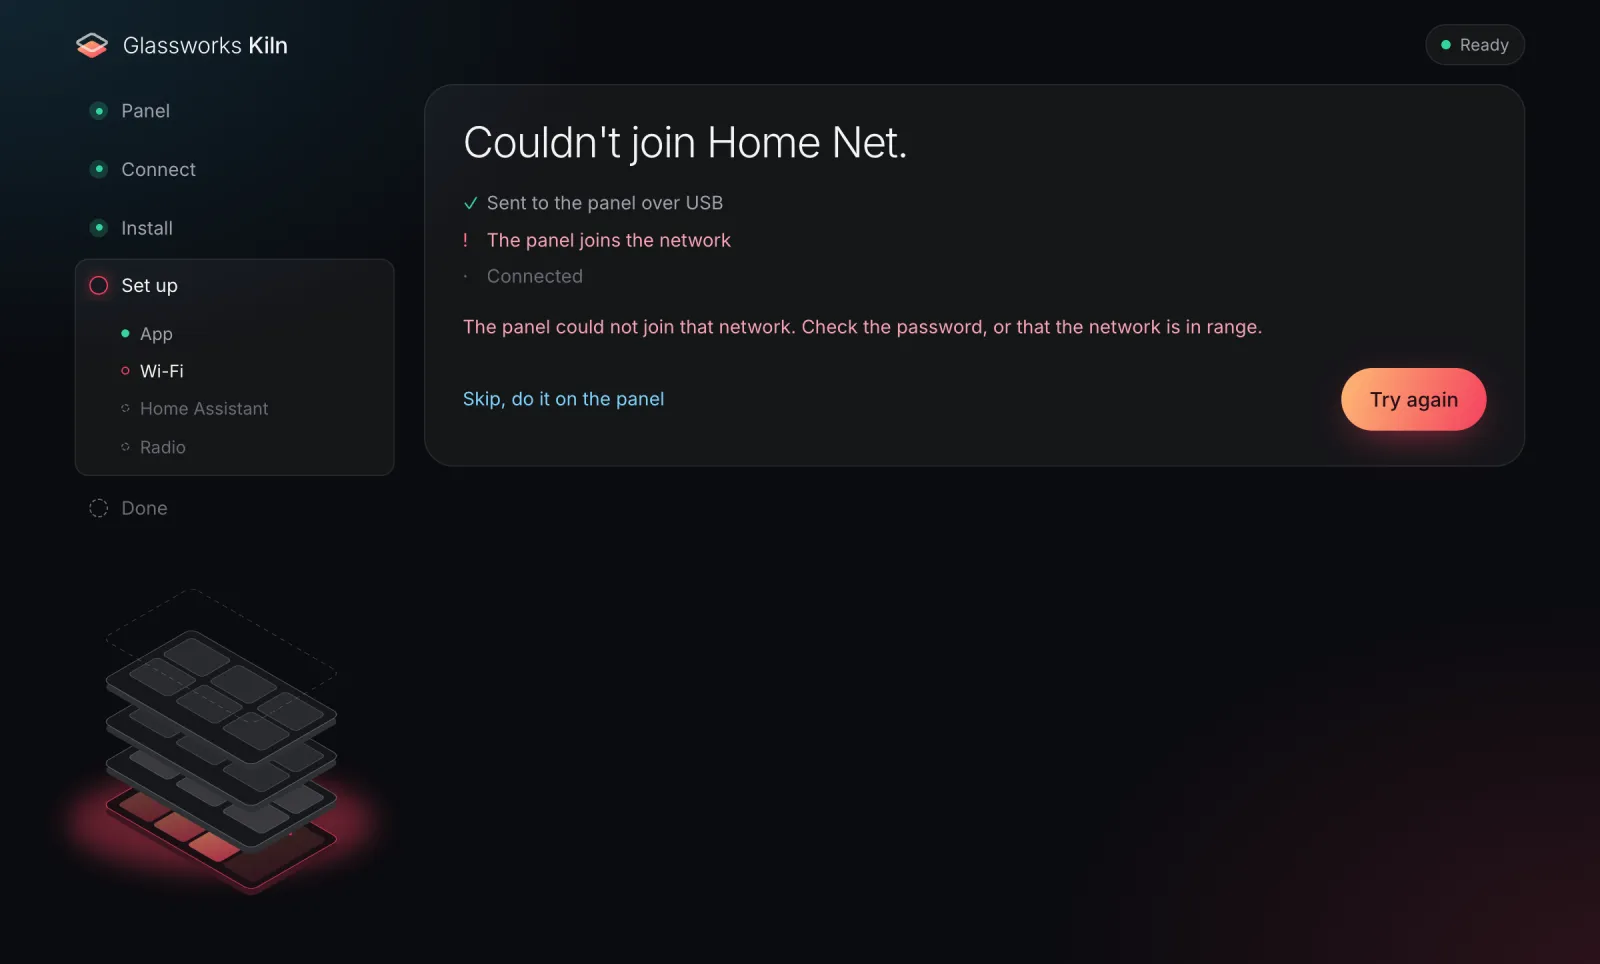 |
| Pick a network. Other… lets you type a name that isn't listed. | A wrong password or a network out of range. Try again, or skip. |
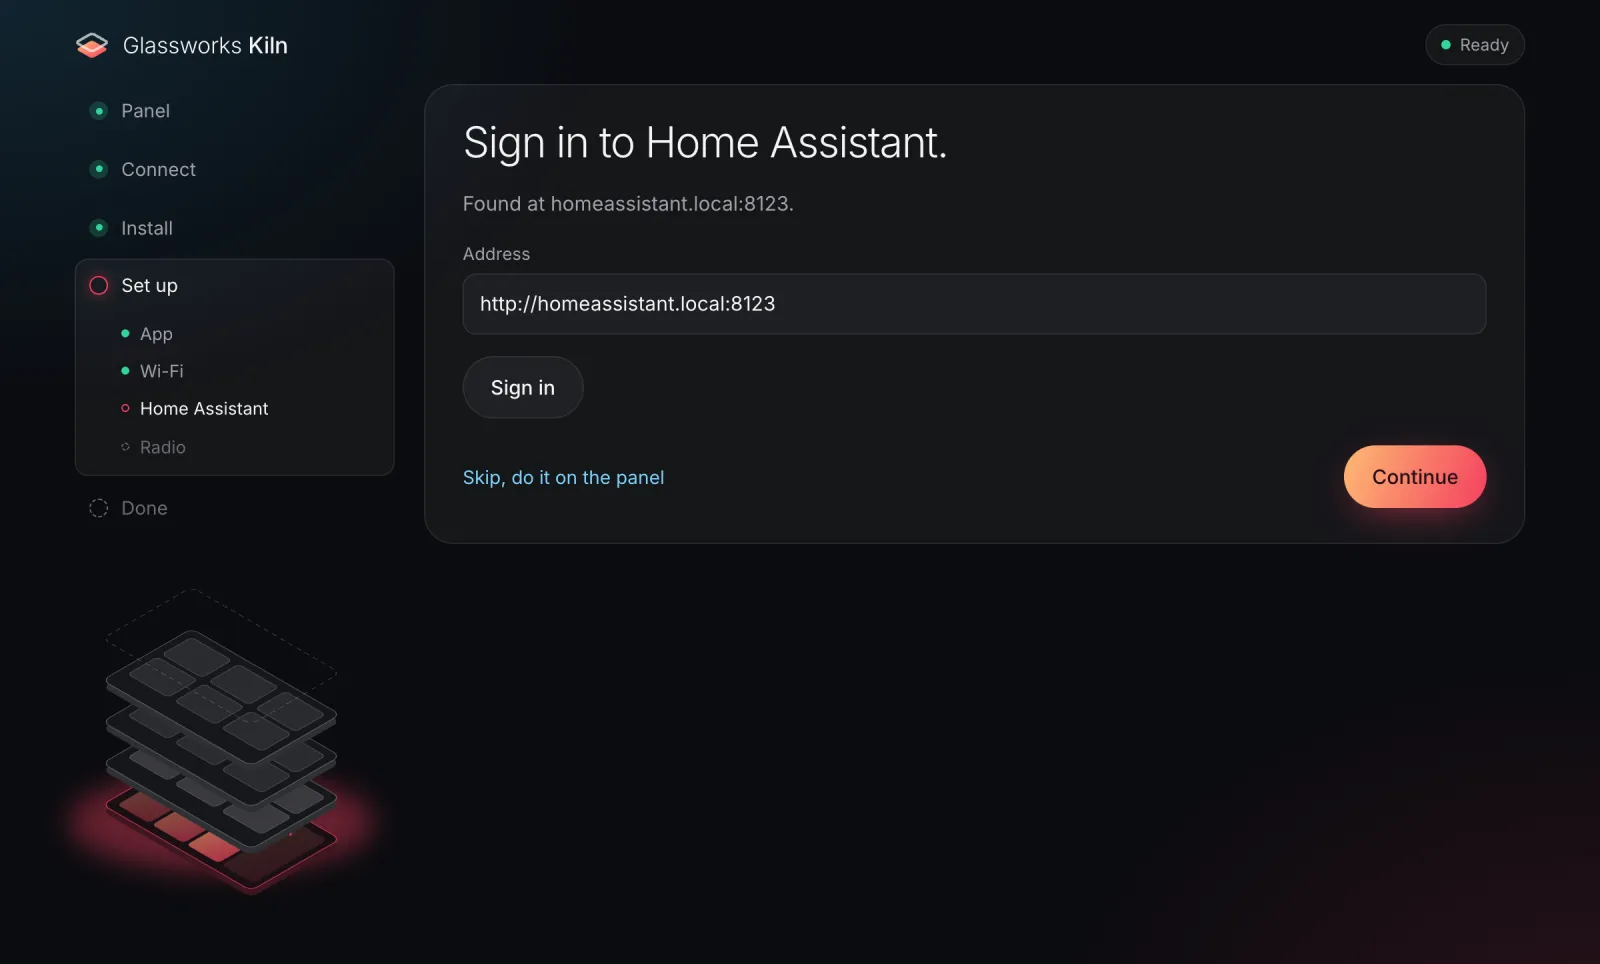
Home Assistant. Kiln shows the address the panel found on your network, or asks you to type it. Sign in opens the panel's own sign-in page in a new tab, the same one its QR code points to, so your login goes from Home Assistant straight to the panel. This page notices when you are done. Then click Continue.
Home Assistant also finds the panel by itself. Click Add on the discovered panel in Settings → Devices & services.
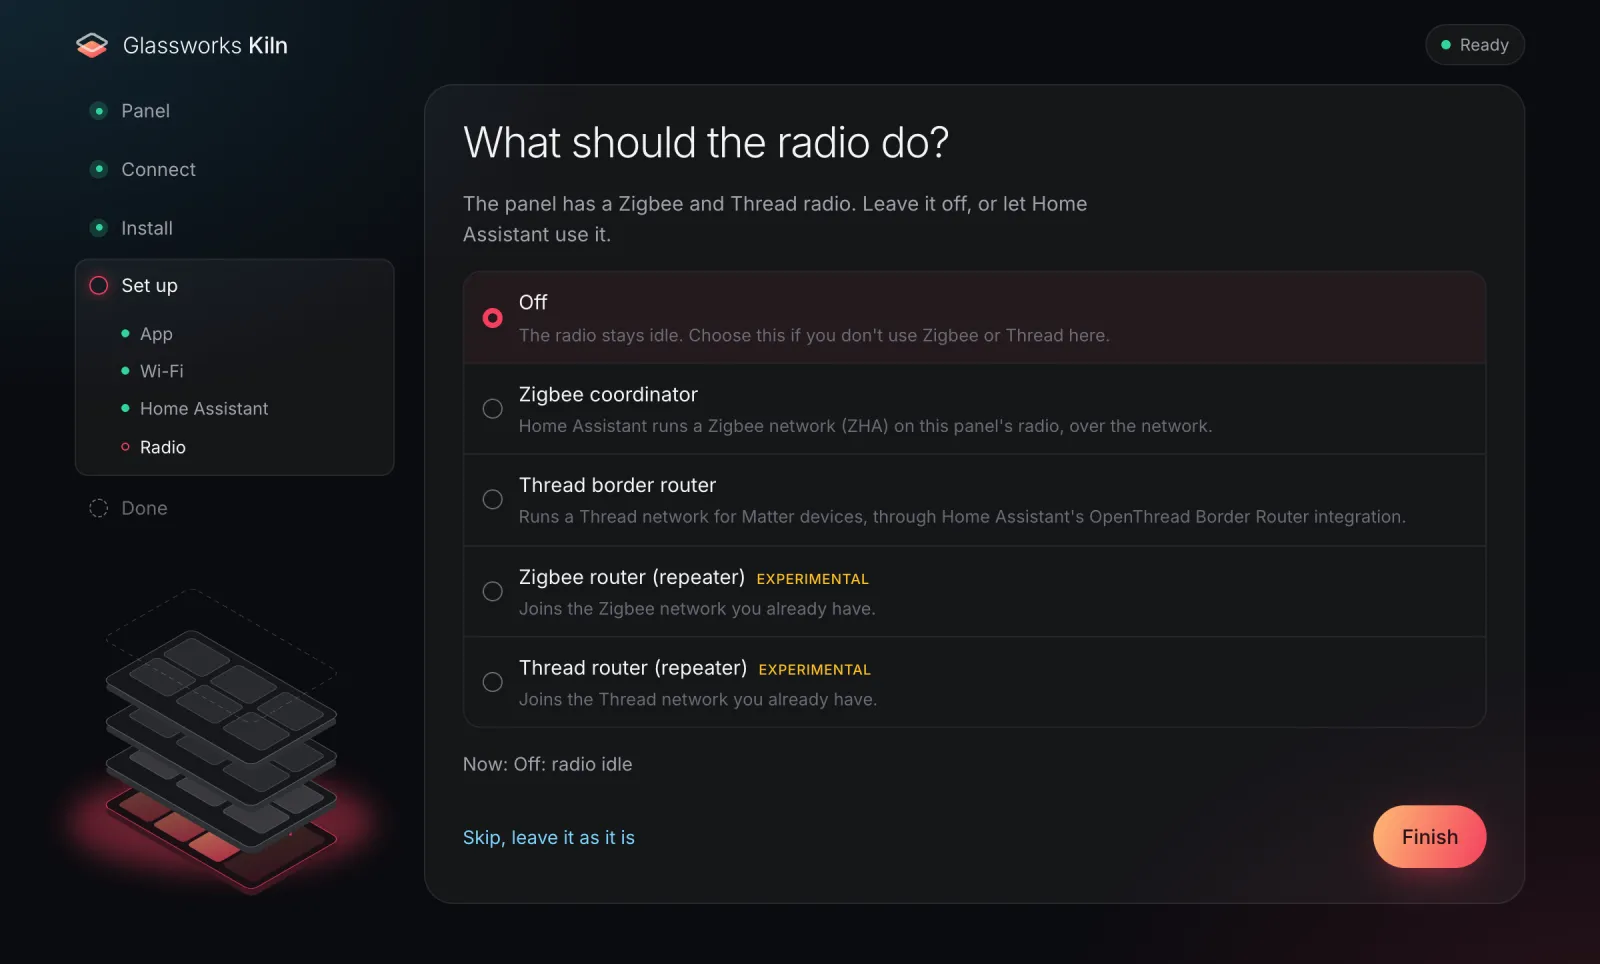
Radio. Choose what the Zigbee/Thread radio does, then Finish. It starts as Off. You can change it any time in Home Assistant.
 |
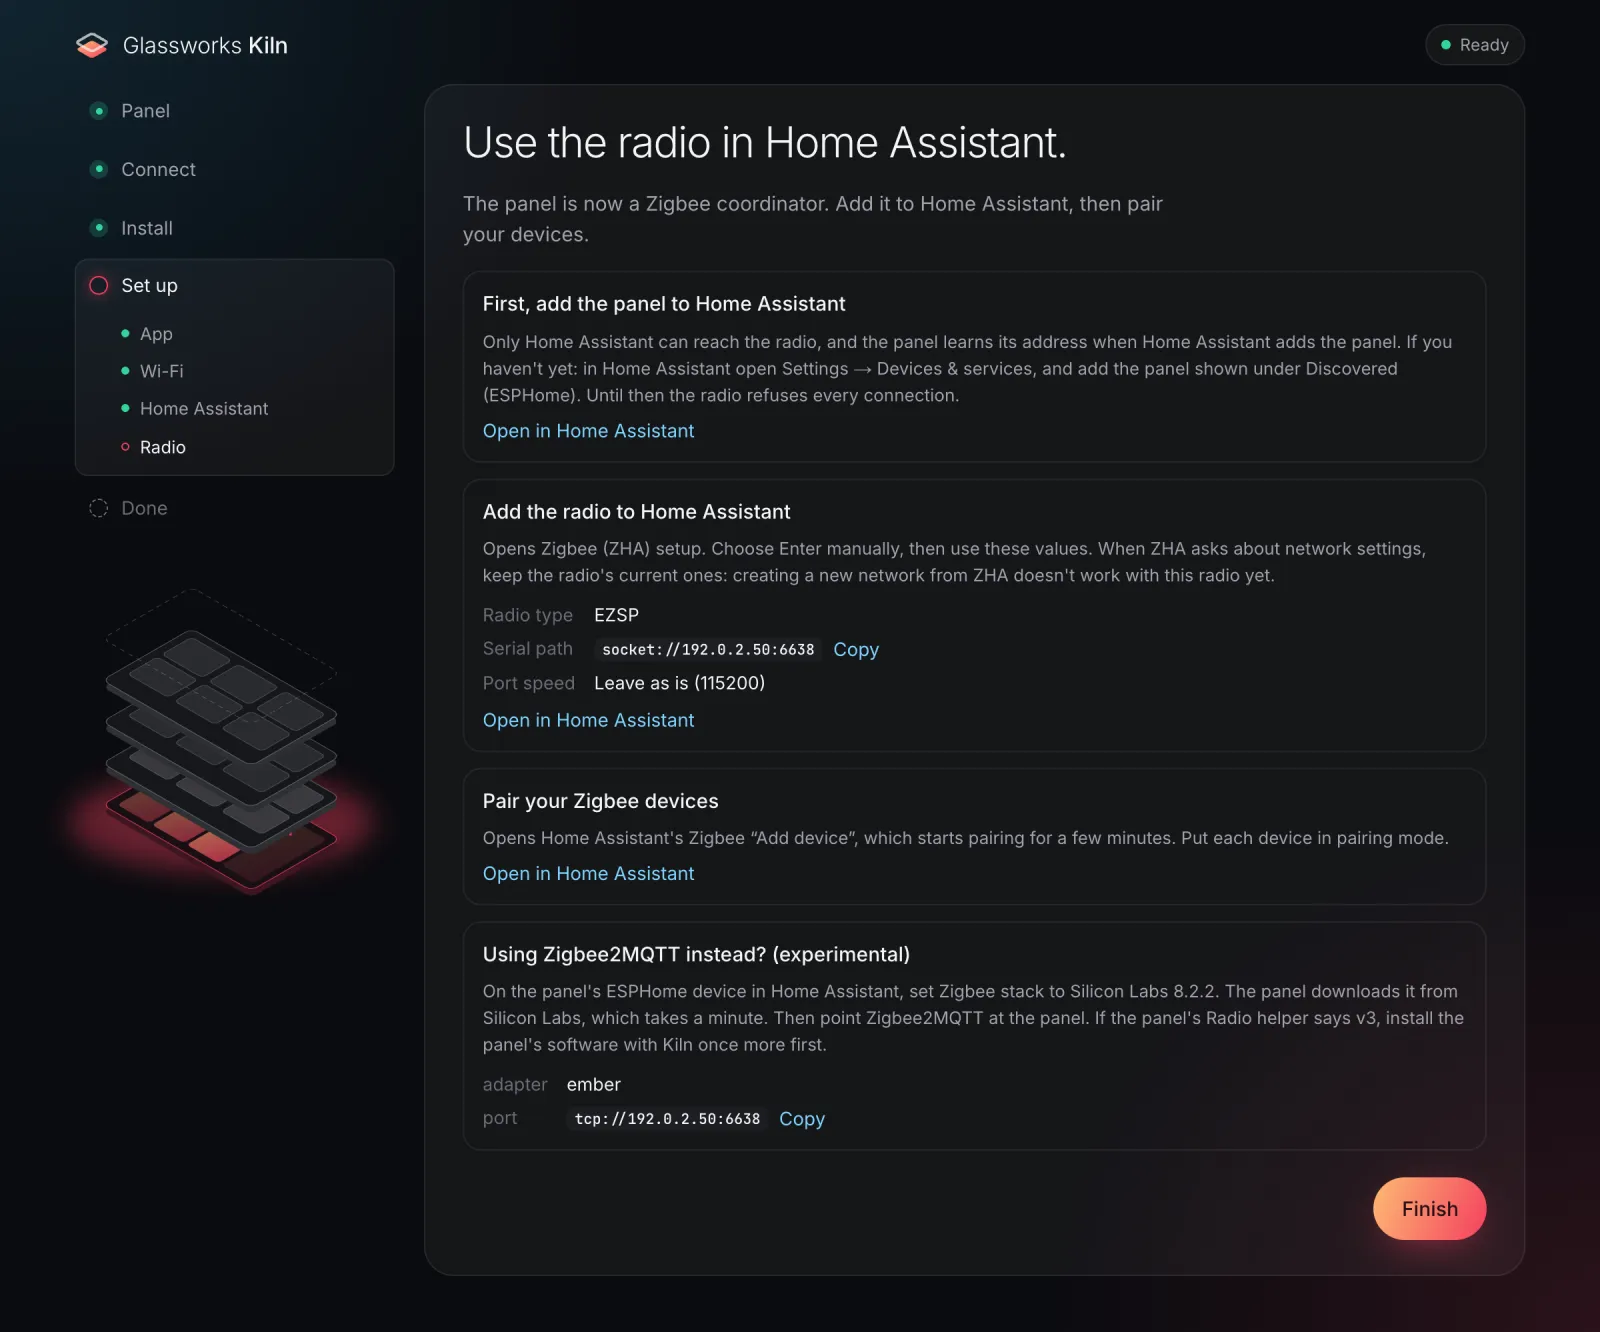 |
| The choice. | What to do next in Home Assistant for the mode you chose, with links that open the right pages and values to copy. |
| Radio mode | Status |
|---|---|
| Off | Default. The radio stays idle. |
| Zigbee coordinator | Home Assistant runs a Zigbee network on the panel's radio, over the network: ZHA, or Zigbee2MQTT (experimental). |
| Thread border router | Runs its own Thread network for Home Assistant's OpenThread Border Router integration. Must be on Home Assistant's network. |
| Zigbee router (repeater), Thread router (repeater) | Experimental. Joins the network you already have and extends it. |
More on each mode: radio-guide.md.
Wi-Fi, Home Assistant and the radio can each be skipped (Skip, do it on the panel) and done later on the panel itself. Its setup screen covers Wi-Fi (including Improv over Bluetooth), adding it to Home Assistant, and QR sign-in. See onboarding.md.
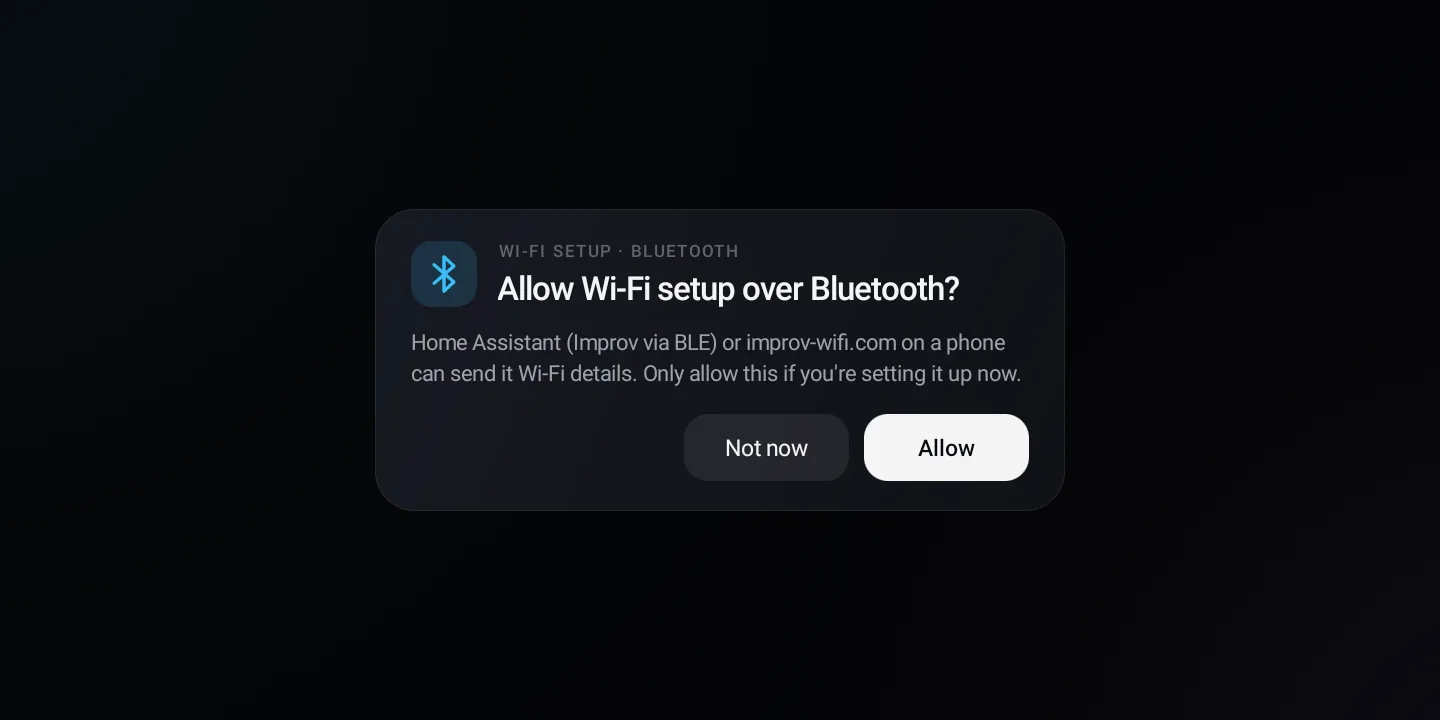
Setting up Wi-Fi on the panel instead: it asks before it accepts Wi-Fi details over Bluetooth.
5 · Done
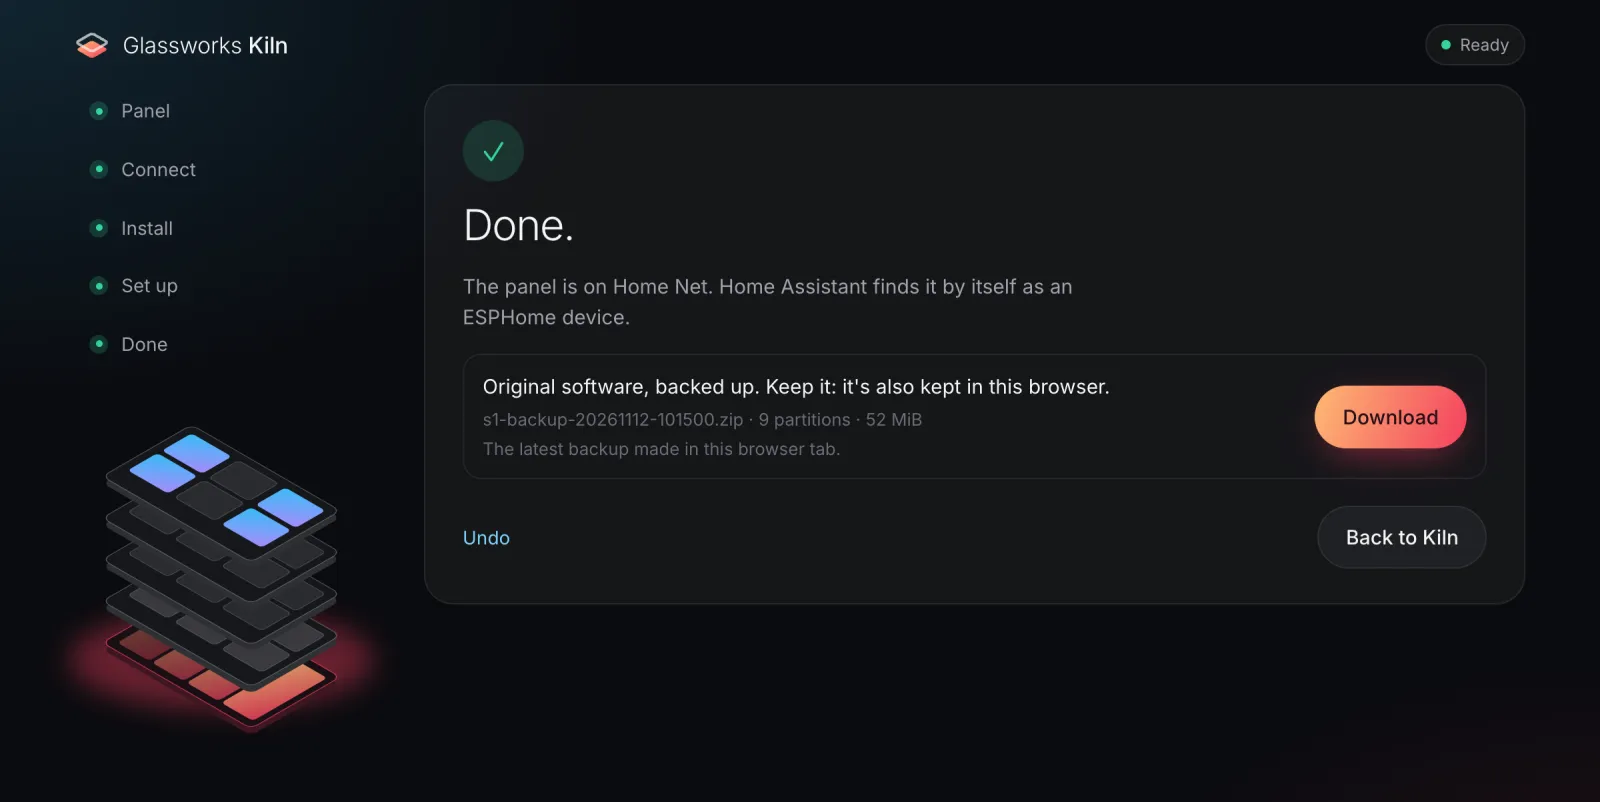
Click Download and keep the .zip.
Download the backup and keep it. The backup from your first install is the only copy of the
panel's original software. The .zip holds each partition and a SHA256SUMS file. It is also kept
in this browser, but clearing the browser's site data deletes that copy. If the panel already had
our software, the row says the backup isn't the original: keep the one from your first install.
Home Assistant discovers the panel as an ESPHome device and sets up encryption by itself. What you get in HA: esphome.md. Music Assistant pairs with the panel automatically: sendspin.md.
When something fails
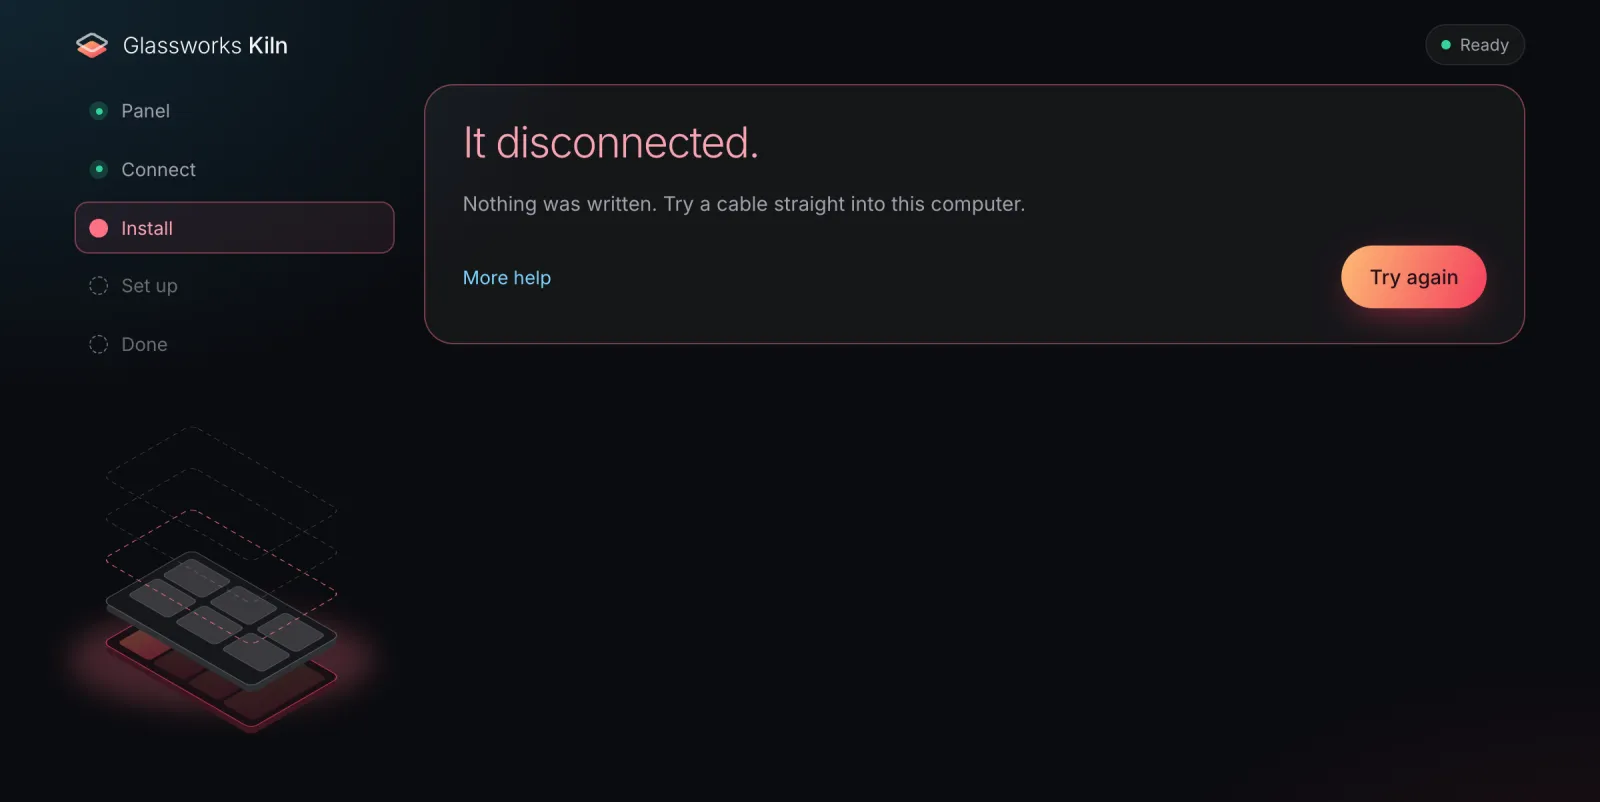
Kiln stops and says three things: what happened, whether anything was written, and the most likely fix. More help has tips, the error message, the technical log, and the way to undo.
 |
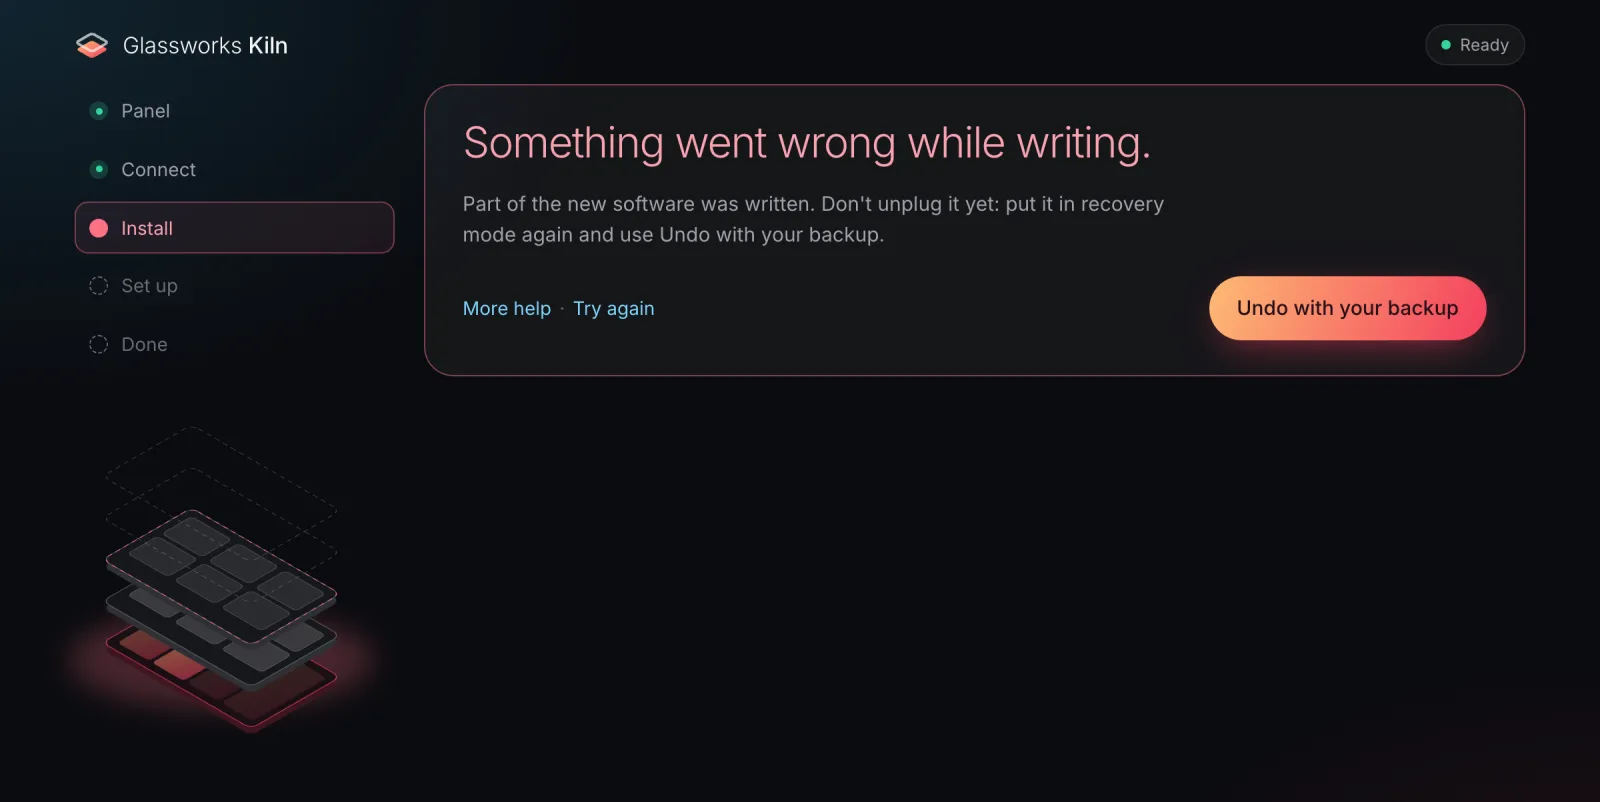 |
| Nothing was written: the panel is as it was. Fix the cause and click Try again. | Part of the new software was written: use Undo with your backup, or try again. Unplug it only to put it in recovery mode again. |
"Don't unplug it yet" means: not while Kiln is still writing, and not to leave it like this, because the panel may not start. Once Kiln has stopped, unplug it, then hold the button and plug it back in to enter recovery mode, as on the Connect screen. Undo connects to it there. FEL is in the chip's ROM, so you can always get back to recovery mode, whatever was written. If a failure came after the new software was in place (during Set up), nothing more can break: unplug the panel, plug it back in, and use Finish setting up. The titles Kiln uses are in Troubleshooting.
Undo
Open Undo an install from Kiln's first screen, or Undo on the Done screen. The rail shows Backup → Connect → Restore → Done.
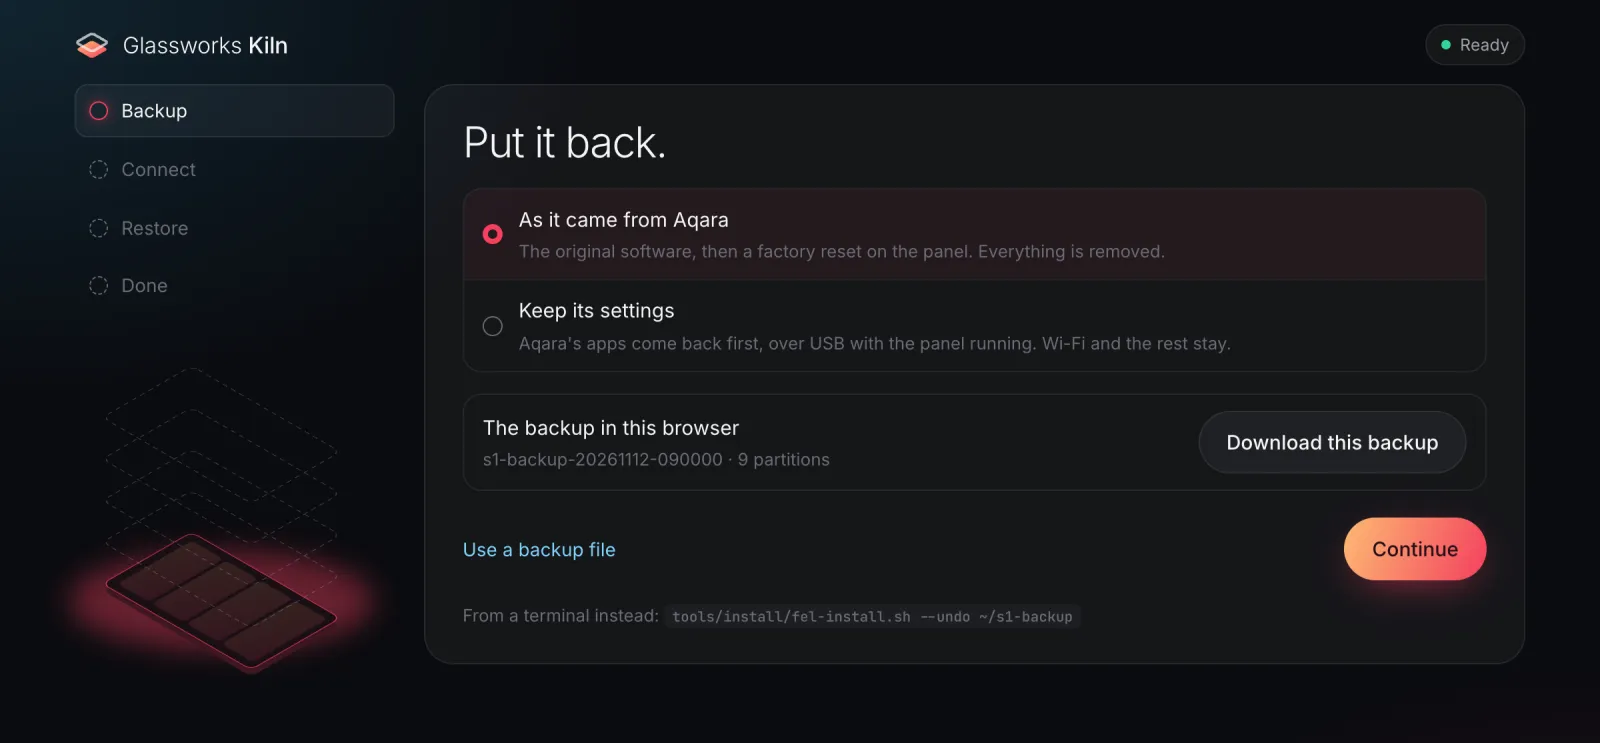
Choose how far back, and which backup. Kiln uses the backup in this browser, or Use a backup
file for the .zip.
- Choose how far back.
- As it came from Aqara: the original software, then a factory reset on the panel. Everything is removed.
- Keep its settings: first, with the panel running and plugged in, Give back Aqara's
apps brings back Aqara's apps, launcher, keyboard, Do Not Disturb and radio services over
USB, and takes S1 Kiosk off (pick
QUAD-CORE R818 EVB2in the list). Wi-Fi and the rest stay. Then the original software goes back too.
- Check the backup. Kiln checks it before anything changes on the panel. It refuses a backup that can't undo the install, and then changes nothing: see which backup below.
- Connect. Click Continue, put the panel in FEL mode, and pick
USB Device (1f3a:efe8), as on the install's Connect screen. - Restore. Kiln writes
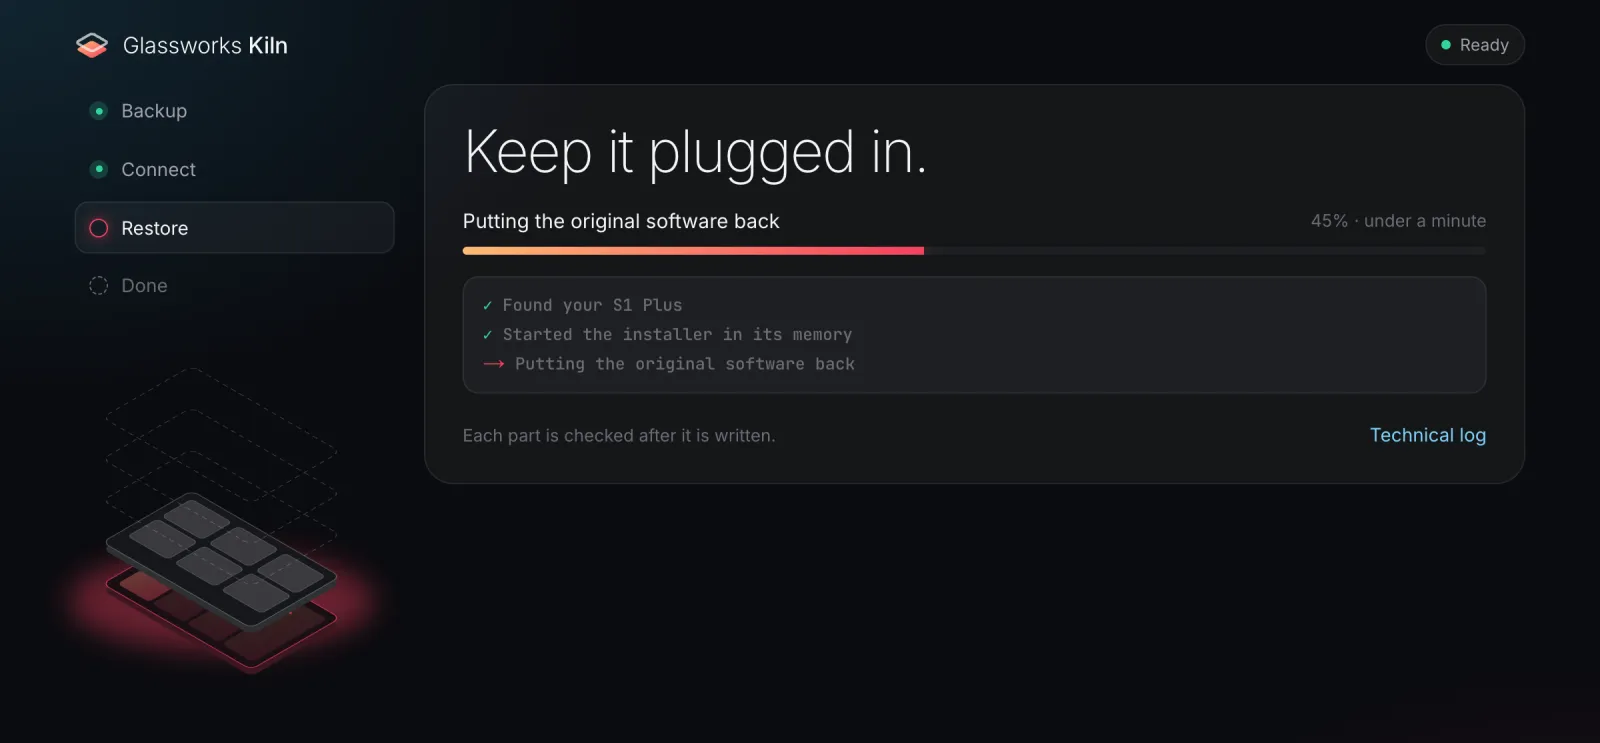
boot,vbmetaand the splash partition back from the backup, and reads each one back to check it.
 |
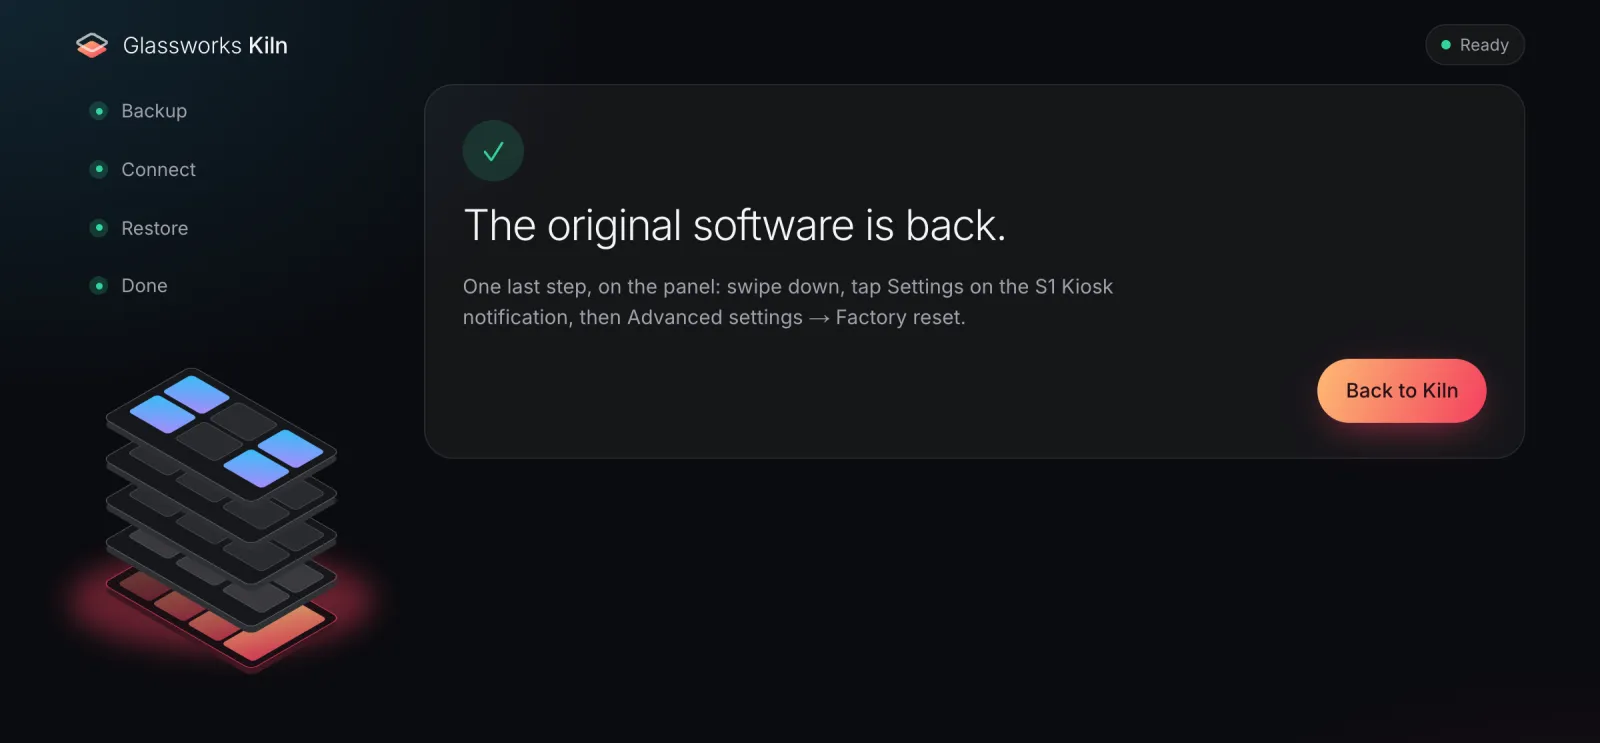 |
| Restore. Keep it plugged in. | Done, for As it came from Aqara: the factory reset is the last step. |
- Factory reset the panel, if you chose As it came from Aqara. On the panel, swipe down from the top, tap Settings on the S1 Kiosk notification, then Advanced settings → Factory reset. A factory reset alone doesn't restore the software, so restore first. With Keep its settings the panel restarts with Aqara's software and apps, and your settings and Wi-Fi as they were.
From the CLI: frames/aqara-s1-plus/tools/install/fel-install.sh --undo ~/s1-backup restores the software, and
frames/aqara-s1-plus/tools/install.sh --undo over adb gives Aqara's apps back. It re-enables Aqara's apps and
launcher, restores Do Not Disturb and the keyboard, removes S1 Kiosk, and starts Aqara's radio
services again. Run on its own, without the restore, it keeps your Wi-Fi and settings and the
patched boot, but drops the kiosk.
If S1 Kiosk saved the panel's Wi-Fi (it does when you set Wi-Fi up through it), it is disabled
rather than removed. Android 10 forgets the networks an app saved when that app is uninstalled,
which would take the panel off its network. A disabled S1 Kiosk doesn't run and isn't the home
screen; adb shell pm enable sh.edm.s1kiosk brings it back. To remove it completely anyway, run
adb uninstall sh.edm.s1kiosk, then join the Wi-Fi again in Aqara's own settings.
Which backup
Use the backup from your first install. A backup taken on an already-installed panel holds the
patched boot, and both installers refuse to restore it. They also refuse a backup whose splash is
already ours, not Aqara's. That happens when boot was put back without its splash (by hand, as
below), and the panel was then installed again: that second backup has a stock boot but our splash.
Use the older backup, from the first install. If you no longer have it, put back only boot and
vbmeta by hand, as below. The splash then stays ours. It is only the power-on image, so the panel
works the same.
Keep the whole backup: the .zip Kiln offers, or the CLI's folder. Undo needs boot.img,
vbmeta.img, bootloader.img (the splash) and SHA256SUMS, and refuses a backup that lacks one of
them, before it writes anything. Kiln then says This backup can't undo the install and links to
the steps below. If you only have boot.img and vbmeta.img, you can still put those
two back by hand. The splash then stays ours. The same goes for a backup refused because its splash
is ours.
Do this only with a backup whose boot and vbmeta are both Aqara's: one made at your first
install, or one refused only because its splash is ours and taken after both boot and vbmeta were
put back. A backup taken after only boot was put back, or after an install that stopped between
writing vbmeta and boot, holds our vbmeta, with verification off. A backup made on an
already-installed panel holds our patched boot. Putting either back by hand leaves our software in
place of Aqara's. The check below shows that the two files are intact, not that they are Aqara's.
First check those two, in the backup's folder. It needs both entries in SHA256SUMS and both files
to match. Go on only if it ends with boot and vbmeta OK: go on:
grep -q '  boot\.img$' SHA256SUMS && grep -q '  vbmeta\.img$' SHA256SUMS &&
  grep -E '  (boot|vbmeta)\.img$' SHA256SUMS | shasum -a 256 -c - &&
  echo "boot and vbmeta OK: go on"
This needs what the command line needs: macOS or Linux (not Windows), a checkout of
this repository, and its U-Boot build. Then put the panel in FEL mode and run this from the
repository's folder, with B set to the backup's folder. Each command runs only if the one before it worked, so a failed flash stops
before the restart. If a flash fails, the panel stays in our U-Boot's fastboot: run that
fastboot flash line again, then the rest.
B=~/s1-backup                                 # the backup's folder
unset ANDROID_SERIAL                          # our U-Boot's fastboot serial isn't the panel's adb one
NO_BL31=1 frames/aqara-s1-plus/tools/fel/fel-boot.sh &&            # our U-Boot in RAM; it starts fastboot
  fastboot flash boot "$B/boot.img" &&
  fastboot flash vbmeta "$B/vbmeta.img" &&
fastboot rebootUpdating
S1 Kiosk updates through Home Assistant. A new release shows up under Settings → Updates as the panel's App update. Press Install; the panel downloads it, checks its checksum and signing key, installs it and restarts the app. There's nothing to confirm on the panel (on boot software from before the first releases, Android asks on the panel's screen). Details: esphome.md.
- On v0.4.0 or older, update by hand once. Those versions can't install an update from Home
Assistant: it always fails with "the APK is not signed". Plug the panel in, open Kiln, choose
Finish setting up (
/aqara-s1-plus/set-up) and let it update S1 Kiosk. Or download the APK from the latest release and runadb install -r s1-kiosk-<version>.apk. From v0.4.1 on, updates from Home Assistant work. - The boot software (the patched
bootwith the root helper) is not updated by the app. Since v0.4.0 the radio side updates with the app instead, but only on a panel with that version's boot software. Home Assistant's Radio helper sensor says whether it needs updating. To update it, run the full install again from Kiln's start (/aqara-s1-plus), with the FEL button. It backs up again first, but keep the backup from your first install: it's the only one with Aqara's originalboot. - A panel running a development build can't take release updates. See the section below.
Command line
Use this path to script the install, or if you don't want to use WebUSB. It runs on macOS or
Linux and needs sunxi-fel, fastboot, adb, Docker (for the boot patch) and a U-Boot build.
# 0. Build U-Boot for the panel (once) and the kiosk app
UBOOT_SRC=~/src/u-boot BL31=<bl31.bin> frames/aqara-s1-plus/tools/fel/build-uboot.sh
./gradlew :kiosk:assembleDebug

# 1. FEL → boot U-Boot from RAM → back up → patch → vbmeta → splash → flash → verify → adb
frames/aqara-s1-plus/tools/install/fel-install.sh ~/s1-backup

# 2. Install and configure S1 Kiosk over adb
frames/aqara-s1-plus/tools/install.sh --url http://homeassistant.local:8123 \
    --timezone America/Los_Angeles --locale en-US \
--keyboard rkr.simplekeyboard.inputmethod_149.apk # optional, from F-Droidfel-install.shwaits for FEL (hold the button, plug in), then backs up to~/s1-backupwith aSHA256SUMSfile. Opt out of the branding withBRANDING=noneandBOOT_ANIMATION=none.install.shinstalls the app, grants its permissions, makes it the home screen, disables Aqara's bloat and night screen-off, and pushes the wake word models.--dry-runprints what it would do.--helplists every option.- Already have adb on a panel?
frames/aqara-s1-plus/tools/install.shalone sets up the app without root. You only get the radio modes with the root helper fromfel-install.sh. - Undo from the CLI: see Undo.
How each step works, and why: frames/aqara-s1-plus/research/root.md and frames/aqara-s1-plus/research/fel.md.
Switching a development build to a release
A panel set up with the command line usually runs a development build of S1 Kiosk
(assembleDebug, signed with your computer's debug key). Releases are signed with the project's
key, and Android won't update an app to one signed with a different key. So the switch removes
the app and installs the release. On its own, that has two side effects:
- the app's data goes: its settings, the Home Assistant sign-in and the pairing key;
- Android 10 also forgets every Wi-Fi network the app saved. S1 Kiosk saves the panel's Wi-Fi itself (Improv), so the panel would drop off the network.
Both installers handle this. Install as usual (Kiln's Finish setting up, or frames/aqara-s1-plus/tools/install.sh --apk <release APK>). When Android refuses the new version, nothing has been changed yet. The
installer then says what will happen on this panel and asks you to confirm: a dialog in the browser,
or typing yes in the terminal (--switch confirms in advance, for scripts). --dry-run shows the
plan without changing anything.
| adb has root | adb has no root (a normal install) | |
|---|---|---|
| App settings, sign-in, pairing key | Kept: copied out before the removal, then copied back to the new install | Reset: sign in again, and set the panel's options again (dashboard, screen and voice settings, for example). Home Assistant may ask to add the panel again, and Music Assistant shows it as a new player |
| Wi-Fi | Read from Android's Wi-Fi store into Kiln's or the CLI's memory, then sent to the new app over USB | Kiln: the Wi-Fi step asks for the password. CLI: asks in the terminal (Enter skips) |
- Root here means that adb's shell can run
su. That is only the case with a development boot image (DEV_SU_HOURS) or a Magisk policy for the adb shell, see frames/aqara-s1-plus/research/root.md. A normal install doesn't give adb root. The installer checks withsu -c id. - The Wi-Fi password is never written to a file, a log or the screen. A network that S1 Kiosk didn't save, for example one set up in Aqara's settings, is not affected.
- While the app is copied it is disabled, so it can't start as the home screen meanwhile. Disabling doesn't touch its Wi-Fi.
- If the new version won't install, the previous one is put back (with its data, given root).
- The panel stays reachable over the USB cable throughout. If it ends up without Wi-Fi anyway, send
it again: Kiln's
/aqara-s1-plus/set-up/wifi, or Improv over Bluetooth from the panel's setup screen or Home Assistant.
Time zone
Aqara's system software sets the time zone again at every boot. Its own (cloud-side) setting is empty
on a panel without Aqara's cloud, so it falls back to UTC+8 and picks the first zone with that offset,
Antarctica/Casey. The panel's root helper (boot image with helper v4) puts the zone you chose back
within seconds after boot, and whenever it changes later.
- The installer records your choice (
persist.s1kiosk.timezone) along with setting it. - To change it later: the panel's ESPHome device in Home Assistant, Configuration, Time zone: an id
like
Europe/BerlinorAmerica/New_York. HA adds it turned off, so turn it on first (how). It only accepts zones the panel knows, and only from Home Assistant's encrypted connection. Time zone status (Diagnostic) says whether the zone is being kept. - Panels set up before this: on their first boot with the new helper it keeps the zone that is in place
then, unless that is Aqara's
Antarctica/Casey; then set Time zone once. - With an older boot image the reset still happens; Time zone status says so.
Troubleshooting
| Symptom | What to try |
|---|---|
| Use Chrome or Edge or Open this page over https instead of Kiln's first screen | This browser has no WebUSB. Use Chrome or Edge on a computer. |
The browser lists no 1f3a:efe8 device, or Kiln says No panel in recovery mode |
The panel isn't in FEL. Unplug it, hold the board button (not the case button), plug in, and hold for 10 s. Try another cable or port, preferably directly on the computer rather than through a hub. |
| Windows: the device shows but won't open | The Zadig step: 1f3a:efe8 needs WinUSB. |
| Linux: "access denied" | The udev rule, then unplug and replug. |
Another program has the panel, or adb already holds it |
Run adb kill-server and close other flashing tools. |
| It disconnected, or The USB connection isn't reliable | A cable straight into the computer, not through a hub or dock. Then Try again. |
| This isn't a panel Kiln knows | Kiln stopped before writing anything. That panel isn't a layout it knows; please open an issue. |
| This panel only runs signed software | Its chip has secure boot on, so Kiln can't start on it. Nothing was written. |
| A download failed | Check the computer's internet connection, then try again. Kiln checks every file it downloads by its SHA-256. |
| Something went wrong while writing, or a read-back didn't match | Kiln stops and doesn't restart the panel, which may not start now. Don't unplug it while Kiln is writing. Once it has stopped, unplug it, put it in recovery mode again (hold the button, plug in) and use Undo with your backup, or try again. FEL is always available. |
| The panel didn't finish starting | Unplug it and plug it back in, then use Finish setting up. |
| This backup can't undo the install | See Which backup. Nothing on the panel was changed. |
| The screen turns off at night | That's the kiosk's night mode, which you can tune in Home Assistant. With install.sh --keep-dnd, Aqara's own Do Not Disturb (22:00–07:00) also forces it off; see frames/aqara-s1-plus/research/screen-policy.md. |